# How to Modify State Variables
> In this guide, we will set up a simple Hardhat project structure, add a contract with a state variable and a function to modify it. We will then write a quick test to make sure the function modifies the state variable as expected - let's get to it! 📘 Hardhat is one of the ultimate web3 development ...
> For the complete documentation index, see [llms.txt](/docs/llms.txt).
In this guide, we will set up a simple [Hardhat](/docs/what-is-hardhat) project structure, add a contract with a state variable and a function to modify it. We will then write a quick test to make sure the function modifies the [state variable](/docs/what-is-ethereum) as expected - let's get to it!
Hardhat is one of the *ultimate* web3 development tools. 🔥 We are creating guides like this in order for you to get some practice using it! Master Hardhat, master web3 development! 🔨
## Step 1: Set Up Project Structure Using Hardhat
1. In a folder of your choice, run `mkdir modify-contract-state && cd modify-contract-state`
2. Run `npm init -y`
3. Run `npm install --save-dev hardhat`
4. Run `npm install @nomiclabs/hardhat-waffle ethereum-waffle chai @nomiclabs/hardhat-ethers ethers`
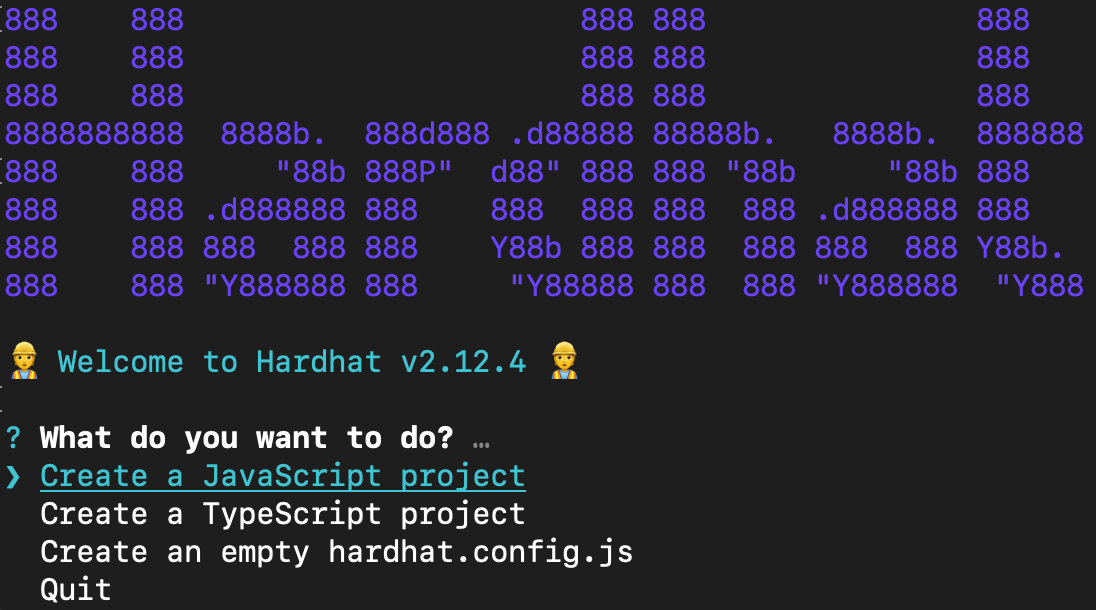
5. Run `npx hardhat` to initiate the Hardhat development environment - it will bring up some yes/no options, use the arrow keys to toggle the options and select `Create an empty hardhat.config.js`
6. Your project directory should now contain the following: `node modules`, `package.json`, `package-lock.json` and the empty `hardhat.config.js` you just created - rolling on!
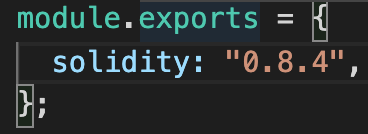
7. Open your project's `hardhat.config.js`, delete all of its contents and copy-paste the following:
```javascript javascript
require("@nomiclabs/hardhat-ethers");
module.exports = {
solidity: "0.8.4",
};
```
**Make sure that the solidity compiler version in your project's `hardhat-config.js` is set to `0.8.4` so that it matches that of the following contract!**
## Step 2: Create Smart Contract
1. From your project root directory, run `mkdir contracts && cd contracts`
2. Run `touch ModifyVariable.sol` (creates a new file called `ModifyVariable.sol` in the current directory) and open the newly-created contract file
3. Copy-paste the following:
```solidity solidity
//SPDX-License-Identifier: MIT
pragma solidity ^0.8.4;
contract ModifyVariable {
uint public x;
constructor(uint _x) {
x = _x;
}
function modifyToLeet() public {
x = 1337;
}
}
```
We've implemented a very simple smart contract that contains one state variable `x` and a function `modifyToLeet` that, when called, changes the state of the variable to be `1337`.
4. Go ahead and save your contract - feel free to add more functions!
## Step 3: Create Test
1. Make sure to go back to your project root directory by running `cd` back from the `contracts` directory
2. In your project root, run `mkdir test` to create a new `/test` directory that will contain all your testing files!
3. In the `/test` directory, create a file called `sample-test.js` and copy-paste the following into it:
```javascript javascript
// import testing libraries: https://www.chaijs.com/guide/styles/
const { expect, assert } = require("chai");
// the `describe` scope encapsulates an entire test called `TestModifyVariable`
// the `it` says the behavior that should be expected from the test
describe("TestModifyVariable", function () {
it("should change x to 1337", async function () {
// this line creates an ethers ContractFactory abstraction: https://docs.ethers.org/v5/api/contract/contract-factory/
const ModifyVariable = await ethers.getContractFactory("ModifyVariable");
// we then use the ContractFactory object to deploy an instance of the contract
const contract = await ModifyVariable.deploy(10);
// wait for contract to be deployed and validated!
await contract.deployed();
// modify x from 10 to 1337 via this function!
await contract.modifyToLeet();
// getter for state variable x
const newX = await contract.x();
assert.equal(newX.toNumber(), 1337);
});
});
```
This test, when executed, will deploy a contract instance `contract` and set `x` (that instance's state variable) to `10`. It then calls the `modifyToLeet()` function on the instance which prompts a change to the state variable to `1337` and then uses `assert.equal()` to verify the change was successful.
4. Go ahead and save the file - feel free to play around with the values and add more tests!
## Step 4: Run the Test
1. In your **project root folder**, run `npx hardhat test`
> If you are still in `/test` in your terminal, just type in `cd ..` and that will push your directory one back! :)
2. Your terminal output should look something like this:
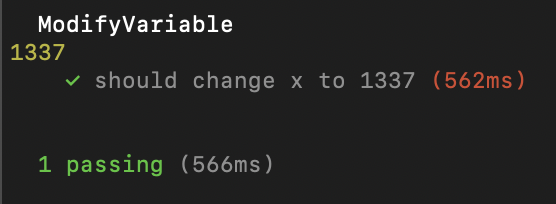
You have successfully set up a whole project structure! With the help of Hardhat, you were able to test whether your functions modifying your smart contract's state variables were actually modified - nice job!
### Extra Challenges:
* Create a new type `string` state variable and modify it
* Change the constructor argument
* Add a new test
* Create a `scripts` directory, deploy your contract and change the contract state
## Learn More About Ethereum Development
Alchemy University offers [free web3 development bootcamps that teach about modifying Ethereum state variables](https://university.alchemy.com/ethereum) and help developers master the fundamentals of web3 technology. Sign up for free, and start building today!