# Hyperliquid Transactions Quickstart
> Step-by-step guide to let users send transactions on hyperliquid.
> For the complete documentation index, see [llms.txt](/docs/llms.txt).
By the end of this tutorial, you’ll have an application integrated with Wallet APIs, enabling email and social login for user authentication, and the ability to sign and send transactions seamlessly.
***
## Getting Started Instructions
## 1. Create a Custom Chain Config
Extend [viem’s custom chains](https://viem.sh/docs/chains/introduction#custom-chains) to create a chain definition for HyperEVM, as it's not a defined chain on viem yet. This is the chain config you’ll be passing into your viem client in step #3.
```tsx
import { defineChain } from "viem";
export const hype = defineChain({
id: 999,
name: "Hype",
nativeCurrency: {
decimals: 18,
name: "Hype",
symbol: "HYPE",
},
rpcUrls: {
default: {
http: ["https://hyperliquid-mainnet.g.alchemy.com/v2/{API_KEY}"],
webSocket: ["wss://hyperliquid-mainnet.g.alchemy.com/v2/{API_KEY}"],
},
},
blockExplorers: {
default: { name: "Explorer", url: "https://hyperevmscan.io/" },
},
});
```
Wrap it in `defineAlchemyChain` to create an alchemy chain to pass into your `config.tsx`
```tsx
import { defineAlchemyChain } from "@account-kit/infra";
const chain = defineAlchemyChain({
chain: hype,
rpcBaseUrl: `https://hyperliquid-mainnet.g.alchemy.com/v2/${API_KEY}`,
});
...
//config.tsx
export const config = createConfig(
{
transport: alchemy({ apiKey: "API_KEY" }),
chain: chain,
ssr: true, // more about ssr: https://www.alchemy.com/docs/wallets/troubleshooting/ssr
storage: cookieStorage, // more about persisting state with cookies: https://www.alchemy.com/docs/wallets/troubleshooting/ssr#persisting-the-account-state
enablePopupOauth: true, // must be set to "true" if you plan on using popup rather than redirect in the social login flow
policyId: "policy_id",
},
uiConfig
);
```
## 2. Set up web2 login with authentication
#### Working with React?
Follow this [Quickstart](https://www.alchemy.com/docs/wallets/react/quickstart) guide to set up a new project.
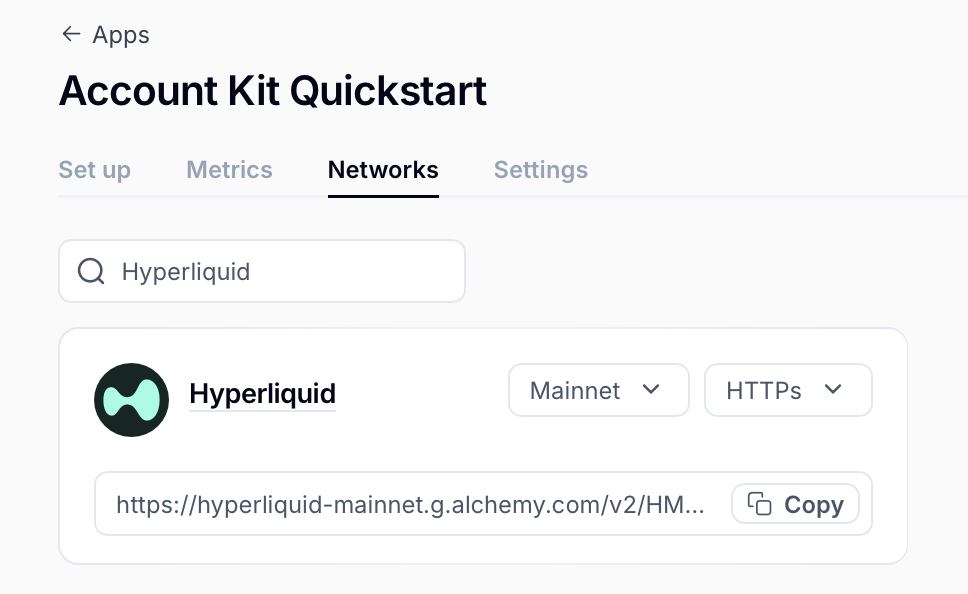
The most important step is getting your API key (`NEXT_PUBLIC_ALCHEMY_API_KEY`) and ensuring your project is configured correctly on the dashboard. Make sure you have Hyperliquid enabled as a network on your app.
Next, navigate to your `page.tsx`, and get the embedded EOA address using [useSigner()](https://www.alchemy.com/docs/wallets/reference/account-kit/react/hooks/useSigner). This new embedded EOA will be where user assets live and will sign transactions.
```tsx
const signer = useSigner();
```
Note: to access your embedded EOA, you need to have finished authentication. To check your authentication status, use [useSignerStatus()](https://www.alchemy.com/docs/wallets/reference/account-kit/react/hooks/useSignerStatus). For example:
```tsx
...
if (signerStatus.isConnected && signer) {
const address = signer.getAddress();
console.log("Connected signer address:", address);
}
...
```
#### Not working with React?
That’s okay! There are lower level methods available to access the authentication provider.
Follow this [Quickstart](https://www.alchemy.com/docs/wallets/signer/quickstart), to use the `@account-kit/signer` package directly to create and use wallets.
#### Create an authentication instance
```tsx
import { AlchemyWebSigner } from "@account-kit/signer";
export const signer = new AlchemyWebSigner({
client: {
connection: {
apiKey: "API_KEY",
},
iframeConfig: {
iframeContainerId: "alchemy-signer-iframe-container",
},
},
});
```
#### Authenticate a user
Next, authenticate your user before you can use the authentication provider. In this example, email auth is used, but a number of other auth methods are supported. Check out the [guides](https://www.alchemy.com/docs/wallets/react/react-hooks) to complete authentication.
```tsx
import { signer } from "./signer";
const result = await signer.authenticate({
type: "email",
email: "example@mail.com",
});
...
```
Once you finish authenticating, you can access the authentication provider!
## 3. Send Transactions
Got your embedded EOA address? Now you are ready to send transactions! The authentication provider supports signing messages as raw hashes. Use methods including `signMessage`, `signTypedData`, and `signTransaction`.
```tsx
const signedTx = await signer.signTransaction(txRequest);
```
Then use a generic wallet client to send transactions. For example, if you are using viem, use the `toViemAccount` method which allows you to use the authentication provider with a [WalletClient](https://viem.sh/docs/clients/wallet#local-accounts-private-key-mnemonic-etc).
```tsx
import { createWalletClient, http, custom, parseEther } from "viem";
export const walletClient = createWalletClient({
transport: http("https://hyperliquid-mainnet.g.alchemy.com/v2/{API_KEY}"),
chain: Hype,
account: signer.toViemAccount(),
});
const txRequest = await walletClient.prepareTransactionRequest({
account: acct,
to: "0x0000000000000000000000000000000000000000",
value: parseEther("0.0001"),
});
// Sign transaction
const txHash = await walletClient.sendRawTransaction({
serializedTransaction: signedTx,
});
```
## 4. Sponsoring transactions
Gas sponsorship lets your users send transactions on HyperEVM without holding the native token for gas. To start, make sure you have a gas policy ID configured in your app dashboard and pass it to your client initialization. Learn more in [Sponsor Gas](https://www.alchemy.com/docs/wallets/transactions/sponsor-gas).
As an example, the following sponsors a HyperEVM transaction opening a limit order, using the HyperCore Writer contract. Start by creating some helpers to encode the call.
```ts
// hyperliquidOrder.ts
import {
encodeAbiParameters,
encodeFunctionData,
hexToBytes,
toHex,
} from "viem";
export const CORE_WRITER_ADDRESS =
"0x3333333333333333333333333333333333333333" as const;
export const HYPERLIQUID_CALLDATA = (() => {
const asset = 0; // BTC
const isBuy = true;
const limitPx = 100000000000n; // $100,000
const sz = 100000n; // 0.001 BTC
const reduceOnly = false;
const encodedTif = 2; // GTC
const cloid = 0n;
const payloadHex = encodeAbiParameters(
[
{ type: "uint32" },
{ type: "bool" },
{ type: "uint64" },
{ type: "uint64" },
{ type: "bool" },
{ type: "uint8" },
{ type: "uint128" },
],
[asset, isBuy, limitPx, sz, reduceOnly, encodedTif, cloid],
);
// encoding version (1 byte) + action ID (3 bytes)
const prefix = new Uint8Array([0x01, 0x00, 0x00, 0x01]);
const payload = hexToBytes(payloadHex);
const actionBytes = new Uint8Array(prefix.length + payload.length);
actionBytes.set(prefix, 0);
actionBytes.set(payload, prefix.length);
const coreWriterAbi = [
{
type: "function",
name: "sendRawAction",
stateMutability: "nonpayable",
inputs: [{ name: "data", type: "bytes", internalType: "bytes" }],
outputs: [],
},
] as const;
return encodeFunctionData({
abi: coreWriterAbi,
functionName: "sendRawAction",
args: [toHex(actionBytes)],
});
})();
```
### Using React
If you are working in React, you can use the [useSendUserOperation](https://www.alchemy.com/docs/wallets/reference/account-kit/react/hooks/useSendUserOperation) hook. Make sure you have set up your config from step 1.
```tsx
import React from "react";
import {
useSendUserOperation,
useSmartAccountClient,
} from "@account-kit/react";
import { CORE_WRITER_ADDRESS, HYPERLIQUID_CALLDATA } from "./hyperliquidOrder";
function ComponentWithSendUserOperation() {
const { client } = useSmartAccountClient({});
const { sendUserOperation, isSendingUserOperation } = useSendUserOperation({
client,
waitForTxn: true,
onSuccess: ({ hash, request }) => {
// [optional] handle success
},
onError: (error) => {
// [optional] handle error
},
});
return (
);
}
export default ComponentWithSendUserOperation;
```
### Without React
If you are not using React, you can send the same user operation directly with the [Modular Account V2 client](https://www.alchemy.com/docs/wallets/reference/account-kit/smart-contracts/functions/createModularAccountV2Client) in account-kit, passing in the chain config from step 1 and signer from step 2.
```ts
import { createModularAccountV2Client } from "@account-kit/smart-contracts";
import { CORE_WRITER_ADDRESS, HYPERLIQUID_CALLDATA } from "./hyperliquidOrder";
const modularAccountV2Client = await createModularAccountV2Client({
chain, // chain config from step 1
signer, // signer from step 2
transport,
policyId: "policy_id",
});
await modularAccountV2Client.sendUserOperation({
uo: {
target: CORE_WRITER_ADDRESS,
data: HYPERLIQUID_CALLDATA,
value: 0n,
},
});
```
### Resources
* [Alchemy Signer](https://www.alchemy.com/docs/wallets/signer/what-is-a-signer)
* [Connect your EOAs](https://www.alchemy.com/docs/wallets/react/login-methods/eoa-login)
* [Alchemy Gas Sponsorship](https://www.alchemy.com/docs/wallets/transactions/sponsor-gas)
* [Viem Custom Chain Support](https://viem.sh/docs/chains/introduction#custom-chains)
* [Full Example](https://github.com/aashkrishnan/hyperevmguide/blob/ash/hyperevm/app/page.tsx)
* [Bridge Funds to Hype](https://debridge.finance/)
 Next, navigate to your `page.tsx`, and get the embedded EOA address using [useSigner()](https://www.alchemy.com/docs/wallets/reference/account-kit/react/hooks/useSigner). This new embedded EOA will be where user assets live and will sign transactions.
```tsx
const signer = useSigner();
```
Note: to access your embedded EOA, you need to have finished authentication. To check your authentication status, use [useSignerStatus()](https://www.alchemy.com/docs/wallets/reference/account-kit/react/hooks/useSignerStatus). For example:
```tsx
...
if (signerStatus.isConnected && signer) {
const address = signer.getAddress();
console.log("Connected signer address:", address);
}
...
```
#### Not working with React?
That’s okay! There are lower level methods available to access the authentication provider.
Follow this [Quickstart](https://www.alchemy.com/docs/wallets/signer/quickstart), to use the `@account-kit/signer` package directly to create and use wallets.
#### Create an authentication instance
```tsx
import { AlchemyWebSigner } from "@account-kit/signer";
export const signer = new AlchemyWebSigner({
client: {
connection: {
apiKey: "API_KEY",
},
iframeConfig: {
iframeContainerId: "alchemy-signer-iframe-container",
},
},
});
```
#### Authenticate a user
Next, authenticate your user before you can use the authentication provider. In this example, email auth is used, but a number of other auth methods are supported. Check out the [guides](https://www.alchemy.com/docs/wallets/react/react-hooks) to complete authentication.
```tsx
import { signer } from "./signer";
const result = await signer.authenticate({
type: "email",
email: "example@mail.com",
});
...
```
Once you finish authenticating, you can access the authentication provider!
## 3. Send Transactions
Got your embedded EOA address? Now you are ready to send transactions! The authentication provider supports signing messages as raw hashes. Use methods including `signMessage`, `signTypedData`, and `signTransaction`.
```tsx
const signedTx = await signer.signTransaction(txRequest);
```
Then use a generic wallet client to send transactions. For example, if you are using viem, use the `toViemAccount` method which allows you to use the authentication provider with a [WalletClient](https://viem.sh/docs/clients/wallet#local-accounts-private-key-mnemonic-etc).
```tsx
import { createWalletClient, http, custom, parseEther } from "viem";
export const walletClient = createWalletClient({
transport: http("https://hyperliquid-mainnet.g.alchemy.com/v2/{API_KEY}"),
chain: Hype,
account: signer.toViemAccount(),
});
const txRequest = await walletClient.prepareTransactionRequest({
account: acct,
to: "0x0000000000000000000000000000000000000000",
value: parseEther("0.0001"),
});
// Sign transaction
const txHash = await walletClient.sendRawTransaction({
serializedTransaction: signedTx,
});
```
## 4. Sponsoring transactions
Gas sponsorship lets your users send transactions on HyperEVM without holding the native token for gas. To start, make sure you have a gas policy ID configured in your app dashboard and pass it to your client initialization. Learn more in [Sponsor Gas](https://www.alchemy.com/docs/wallets/transactions/sponsor-gas).
As an example, the following sponsors a HyperEVM transaction opening a limit order, using the HyperCore Writer contract. Start by creating some helpers to encode the call.
```ts
// hyperliquidOrder.ts
import {
encodeAbiParameters,
encodeFunctionData,
hexToBytes,
toHex,
} from "viem";
export const CORE_WRITER_ADDRESS =
"0x3333333333333333333333333333333333333333" as const;
export const HYPERLIQUID_CALLDATA = (() => {
const asset = 0; // BTC
const isBuy = true;
const limitPx = 100000000000n; // $100,000
const sz = 100000n; // 0.001 BTC
const reduceOnly = false;
const encodedTif = 2; // GTC
const cloid = 0n;
const payloadHex = encodeAbiParameters(
[
{ type: "uint32" },
{ type: "bool" },
{ type: "uint64" },
{ type: "uint64" },
{ type: "bool" },
{ type: "uint8" },
{ type: "uint128" },
],
[asset, isBuy, limitPx, sz, reduceOnly, encodedTif, cloid],
);
// encoding version (1 byte) + action ID (3 bytes)
const prefix = new Uint8Array([0x01, 0x00, 0x00, 0x01]);
const payload = hexToBytes(payloadHex);
const actionBytes = new Uint8Array(prefix.length + payload.length);
actionBytes.set(prefix, 0);
actionBytes.set(payload, prefix.length);
const coreWriterAbi = [
{
type: "function",
name: "sendRawAction",
stateMutability: "nonpayable",
inputs: [{ name: "data", type: "bytes", internalType: "bytes" }],
outputs: [],
},
] as const;
return encodeFunctionData({
abi: coreWriterAbi,
functionName: "sendRawAction",
args: [toHex(actionBytes)],
});
})();
```
### Using React
If you are working in React, you can use the [useSendUserOperation](https://www.alchemy.com/docs/wallets/reference/account-kit/react/hooks/useSendUserOperation) hook. Make sure you have set up your config from step 1.
```tsx
import React from "react";
import {
useSendUserOperation,
useSmartAccountClient,
} from "@account-kit/react";
import { CORE_WRITER_ADDRESS, HYPERLIQUID_CALLDATA } from "./hyperliquidOrder";
function ComponentWithSendUserOperation() {
const { client } = useSmartAccountClient({});
const { sendUserOperation, isSendingUserOperation } = useSendUserOperation({
client,
waitForTxn: true,
onSuccess: ({ hash, request }) => {
// [optional] handle success
},
onError: (error) => {
// [optional] handle error
},
});
return (
Next, navigate to your `page.tsx`, and get the embedded EOA address using [useSigner()](https://www.alchemy.com/docs/wallets/reference/account-kit/react/hooks/useSigner). This new embedded EOA will be where user assets live and will sign transactions.
```tsx
const signer = useSigner();
```
Note: to access your embedded EOA, you need to have finished authentication. To check your authentication status, use [useSignerStatus()](https://www.alchemy.com/docs/wallets/reference/account-kit/react/hooks/useSignerStatus). For example:
```tsx
...
if (signerStatus.isConnected && signer) {
const address = signer.getAddress();
console.log("Connected signer address:", address);
}
...
```
#### Not working with React?
That’s okay! There are lower level methods available to access the authentication provider.
Follow this [Quickstart](https://www.alchemy.com/docs/wallets/signer/quickstart), to use the `@account-kit/signer` package directly to create and use wallets.
#### Create an authentication instance
```tsx
import { AlchemyWebSigner } from "@account-kit/signer";
export const signer = new AlchemyWebSigner({
client: {
connection: {
apiKey: "API_KEY",
},
iframeConfig: {
iframeContainerId: "alchemy-signer-iframe-container",
},
},
});
```
#### Authenticate a user
Next, authenticate your user before you can use the authentication provider. In this example, email auth is used, but a number of other auth methods are supported. Check out the [guides](https://www.alchemy.com/docs/wallets/react/react-hooks) to complete authentication.
```tsx
import { signer } from "./signer";
const result = await signer.authenticate({
type: "email",
email: "example@mail.com",
});
...
```
Once you finish authenticating, you can access the authentication provider!
## 3. Send Transactions
Got your embedded EOA address? Now you are ready to send transactions! The authentication provider supports signing messages as raw hashes. Use methods including `signMessage`, `signTypedData`, and `signTransaction`.
```tsx
const signedTx = await signer.signTransaction(txRequest);
```
Then use a generic wallet client to send transactions. For example, if you are using viem, use the `toViemAccount` method which allows you to use the authentication provider with a [WalletClient](https://viem.sh/docs/clients/wallet#local-accounts-private-key-mnemonic-etc).
```tsx
import { createWalletClient, http, custom, parseEther } from "viem";
export const walletClient = createWalletClient({
transport: http("https://hyperliquid-mainnet.g.alchemy.com/v2/{API_KEY}"),
chain: Hype,
account: signer.toViemAccount(),
});
const txRequest = await walletClient.prepareTransactionRequest({
account: acct,
to: "0x0000000000000000000000000000000000000000",
value: parseEther("0.0001"),
});
// Sign transaction
const txHash = await walletClient.sendRawTransaction({
serializedTransaction: signedTx,
});
```
## 4. Sponsoring transactions
Gas sponsorship lets your users send transactions on HyperEVM without holding the native token for gas. To start, make sure you have a gas policy ID configured in your app dashboard and pass it to your client initialization. Learn more in [Sponsor Gas](https://www.alchemy.com/docs/wallets/transactions/sponsor-gas).
As an example, the following sponsors a HyperEVM transaction opening a limit order, using the HyperCore Writer contract. Start by creating some helpers to encode the call.
```ts
// hyperliquidOrder.ts
import {
encodeAbiParameters,
encodeFunctionData,
hexToBytes,
toHex,
} from "viem";
export const CORE_WRITER_ADDRESS =
"0x3333333333333333333333333333333333333333" as const;
export const HYPERLIQUID_CALLDATA = (() => {
const asset = 0; // BTC
const isBuy = true;
const limitPx = 100000000000n; // $100,000
const sz = 100000n; // 0.001 BTC
const reduceOnly = false;
const encodedTif = 2; // GTC
const cloid = 0n;
const payloadHex = encodeAbiParameters(
[
{ type: "uint32" },
{ type: "bool" },
{ type: "uint64" },
{ type: "uint64" },
{ type: "bool" },
{ type: "uint8" },
{ type: "uint128" },
],
[asset, isBuy, limitPx, sz, reduceOnly, encodedTif, cloid],
);
// encoding version (1 byte) + action ID (3 bytes)
const prefix = new Uint8Array([0x01, 0x00, 0x00, 0x01]);
const payload = hexToBytes(payloadHex);
const actionBytes = new Uint8Array(prefix.length + payload.length);
actionBytes.set(prefix, 0);
actionBytes.set(payload, prefix.length);
const coreWriterAbi = [
{
type: "function",
name: "sendRawAction",
stateMutability: "nonpayable",
inputs: [{ name: "data", type: "bytes", internalType: "bytes" }],
outputs: [],
},
] as const;
return encodeFunctionData({
abi: coreWriterAbi,
functionName: "sendRawAction",
args: [toHex(actionBytes)],
});
})();
```
### Using React
If you are working in React, you can use the [useSendUserOperation](https://www.alchemy.com/docs/wallets/reference/account-kit/react/hooks/useSendUserOperation) hook. Make sure you have set up your config from step 1.
```tsx
import React from "react";
import {
useSendUserOperation,
useSmartAccountClient,
} from "@account-kit/react";
import { CORE_WRITER_ADDRESS, HYPERLIQUID_CALLDATA } from "./hyperliquidOrder";
function ComponentWithSendUserOperation() {
const { client } = useSmartAccountClient({});
const { sendUserOperation, isSendingUserOperation } = useSendUserOperation({
client,
waitForTxn: true,
onSuccess: ({ hash, request }) => {
// [optional] handle success
},
onError: (error) => {
// [optional] handle error
},
});
return (