# Authentication quickstart
> Get started with the authentication provider
> For the complete documentation index, see [llms.txt](/docs/llms.txt).
Using React? Follow [this](/docs/wallets/react/quickstart) quickstart guide instead
for easy-to-use React hooks and integration with Wallet APIs.
If you're not using React, use the `@account-kit/signer` package to create and use Wallet APIs.
## Get your API key and create an account config
1. Get your **API key** by creating a new app in your [dashboard](https://dashboard.alchemy.com/apps)
Make sure **your desired network** is enabled for your app under the
Networks tab.
2. Activate **smart wallets** for your app in your [dashboard](https://dashboard.alchemy.com/apps/latest/services/smart-wallets)
1. Apply the config to your app from step 1
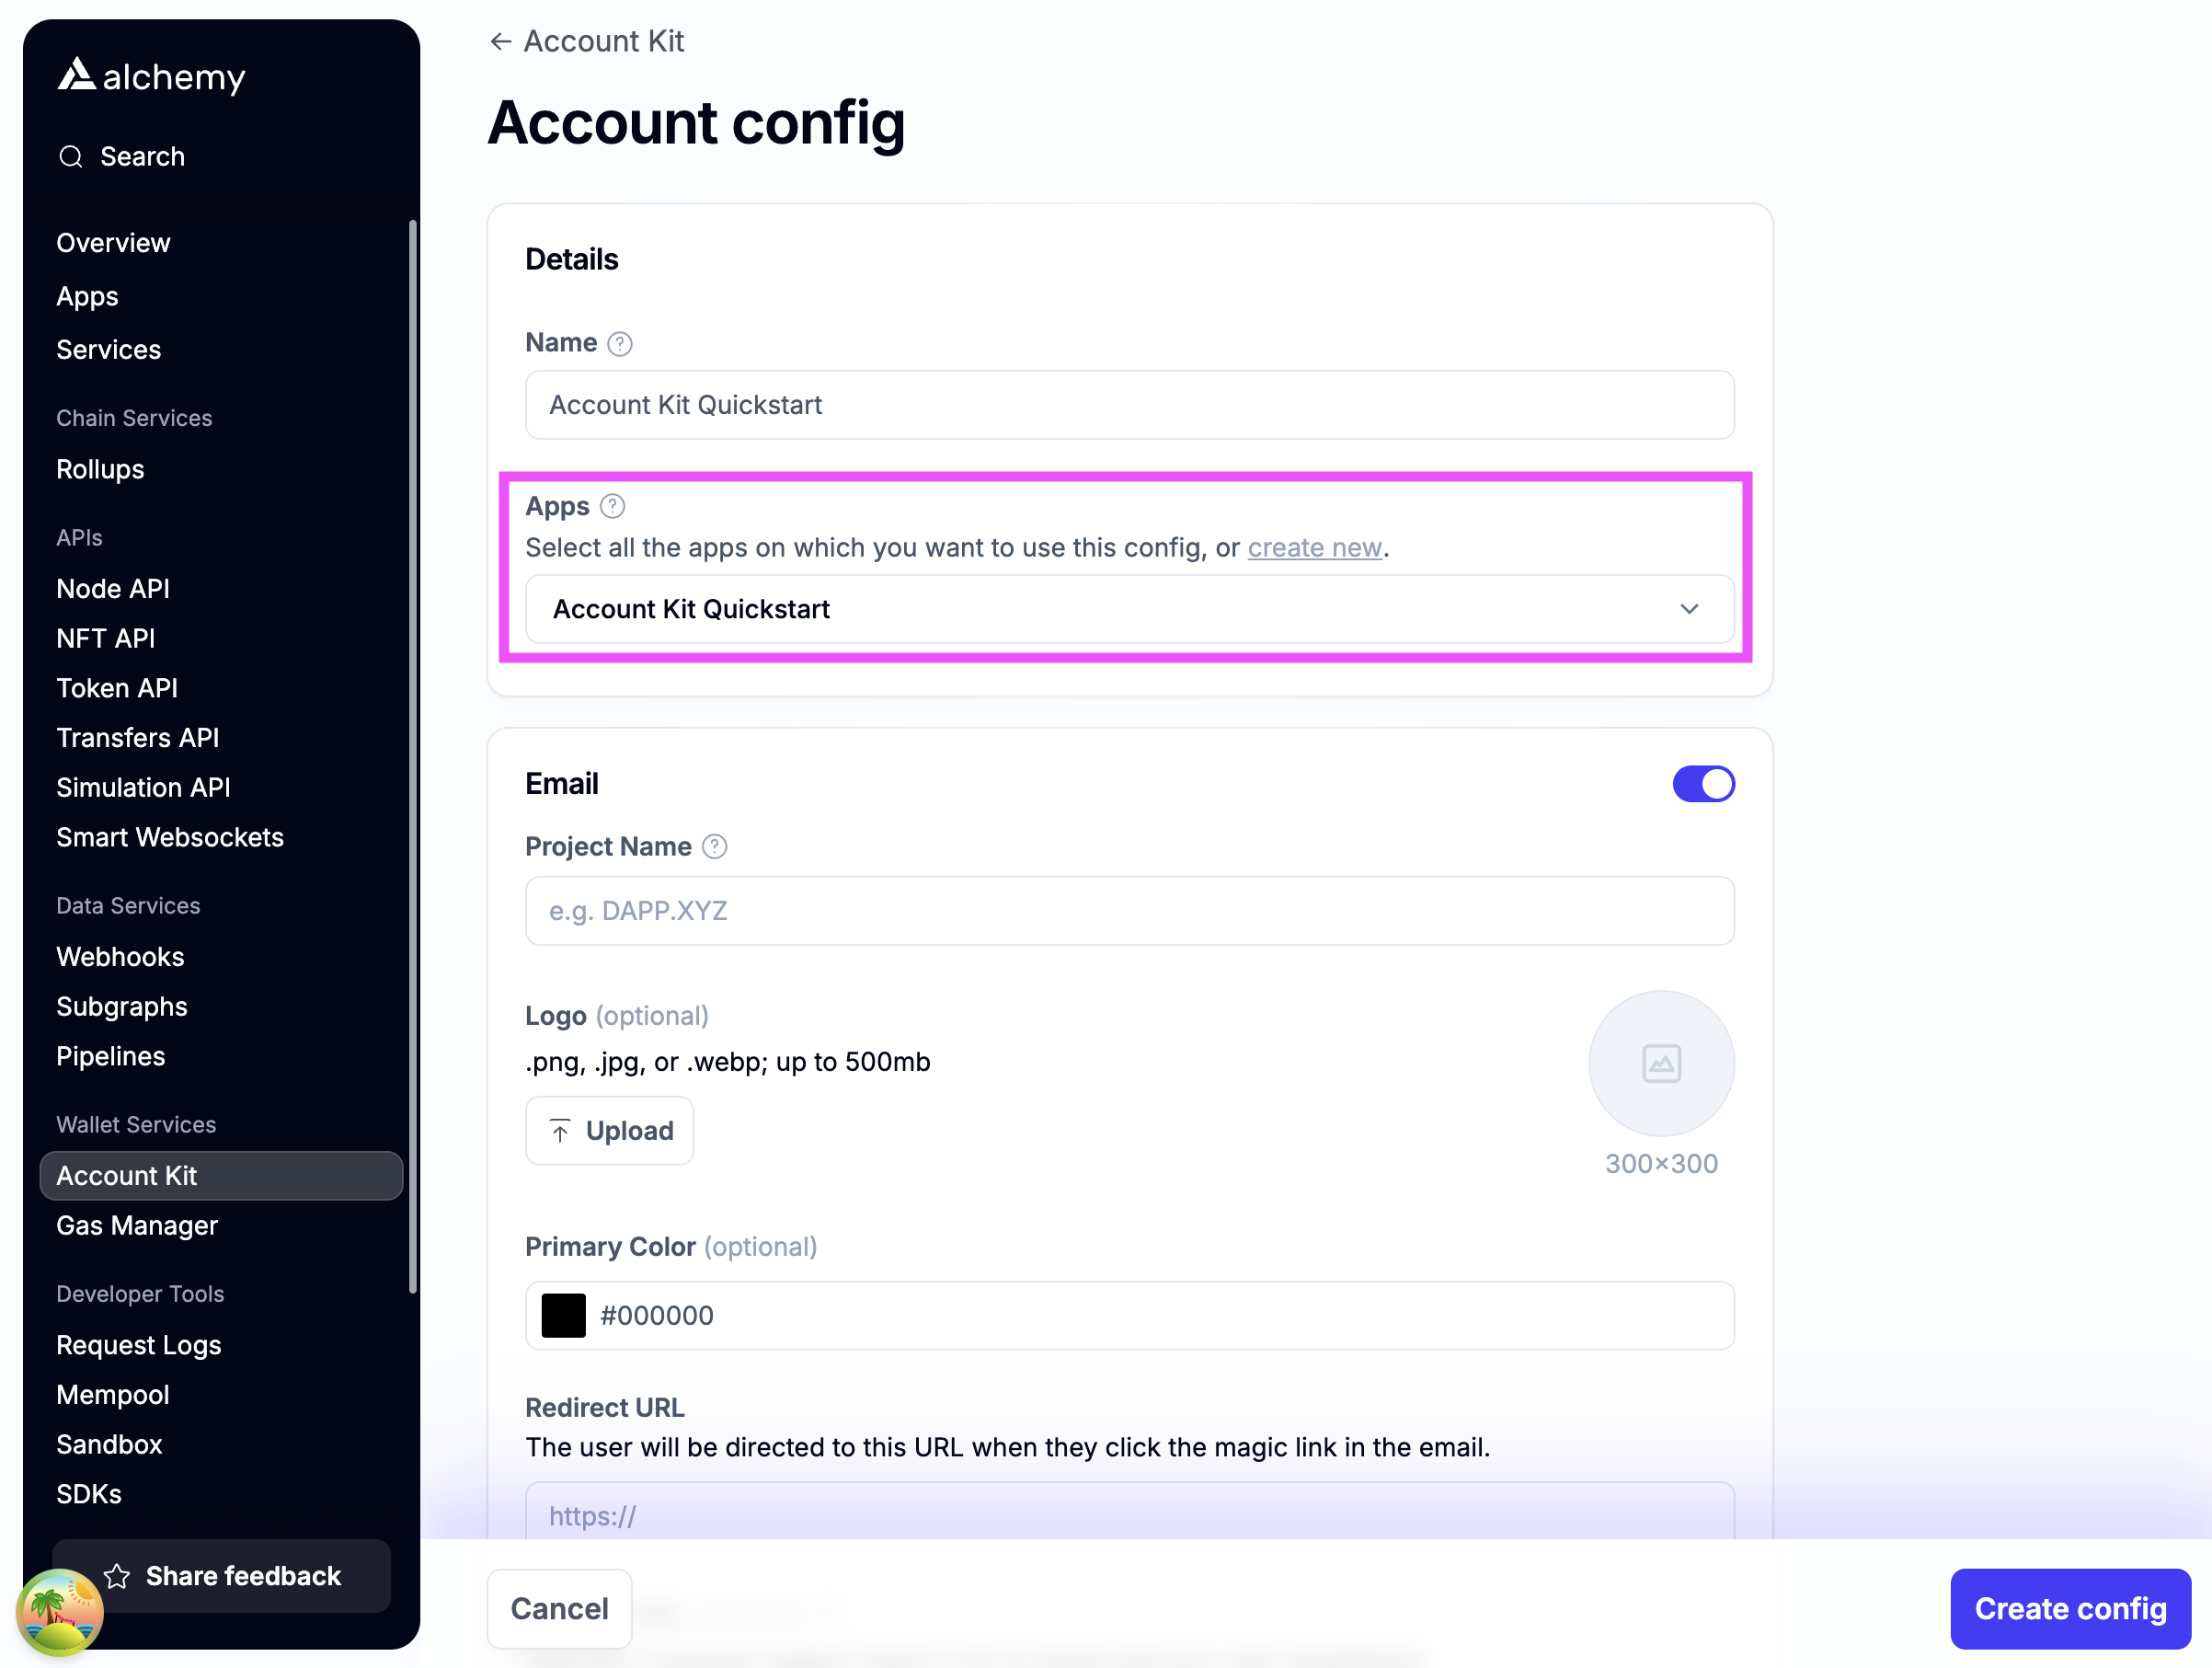 2. Enable authentication methods you want to support.
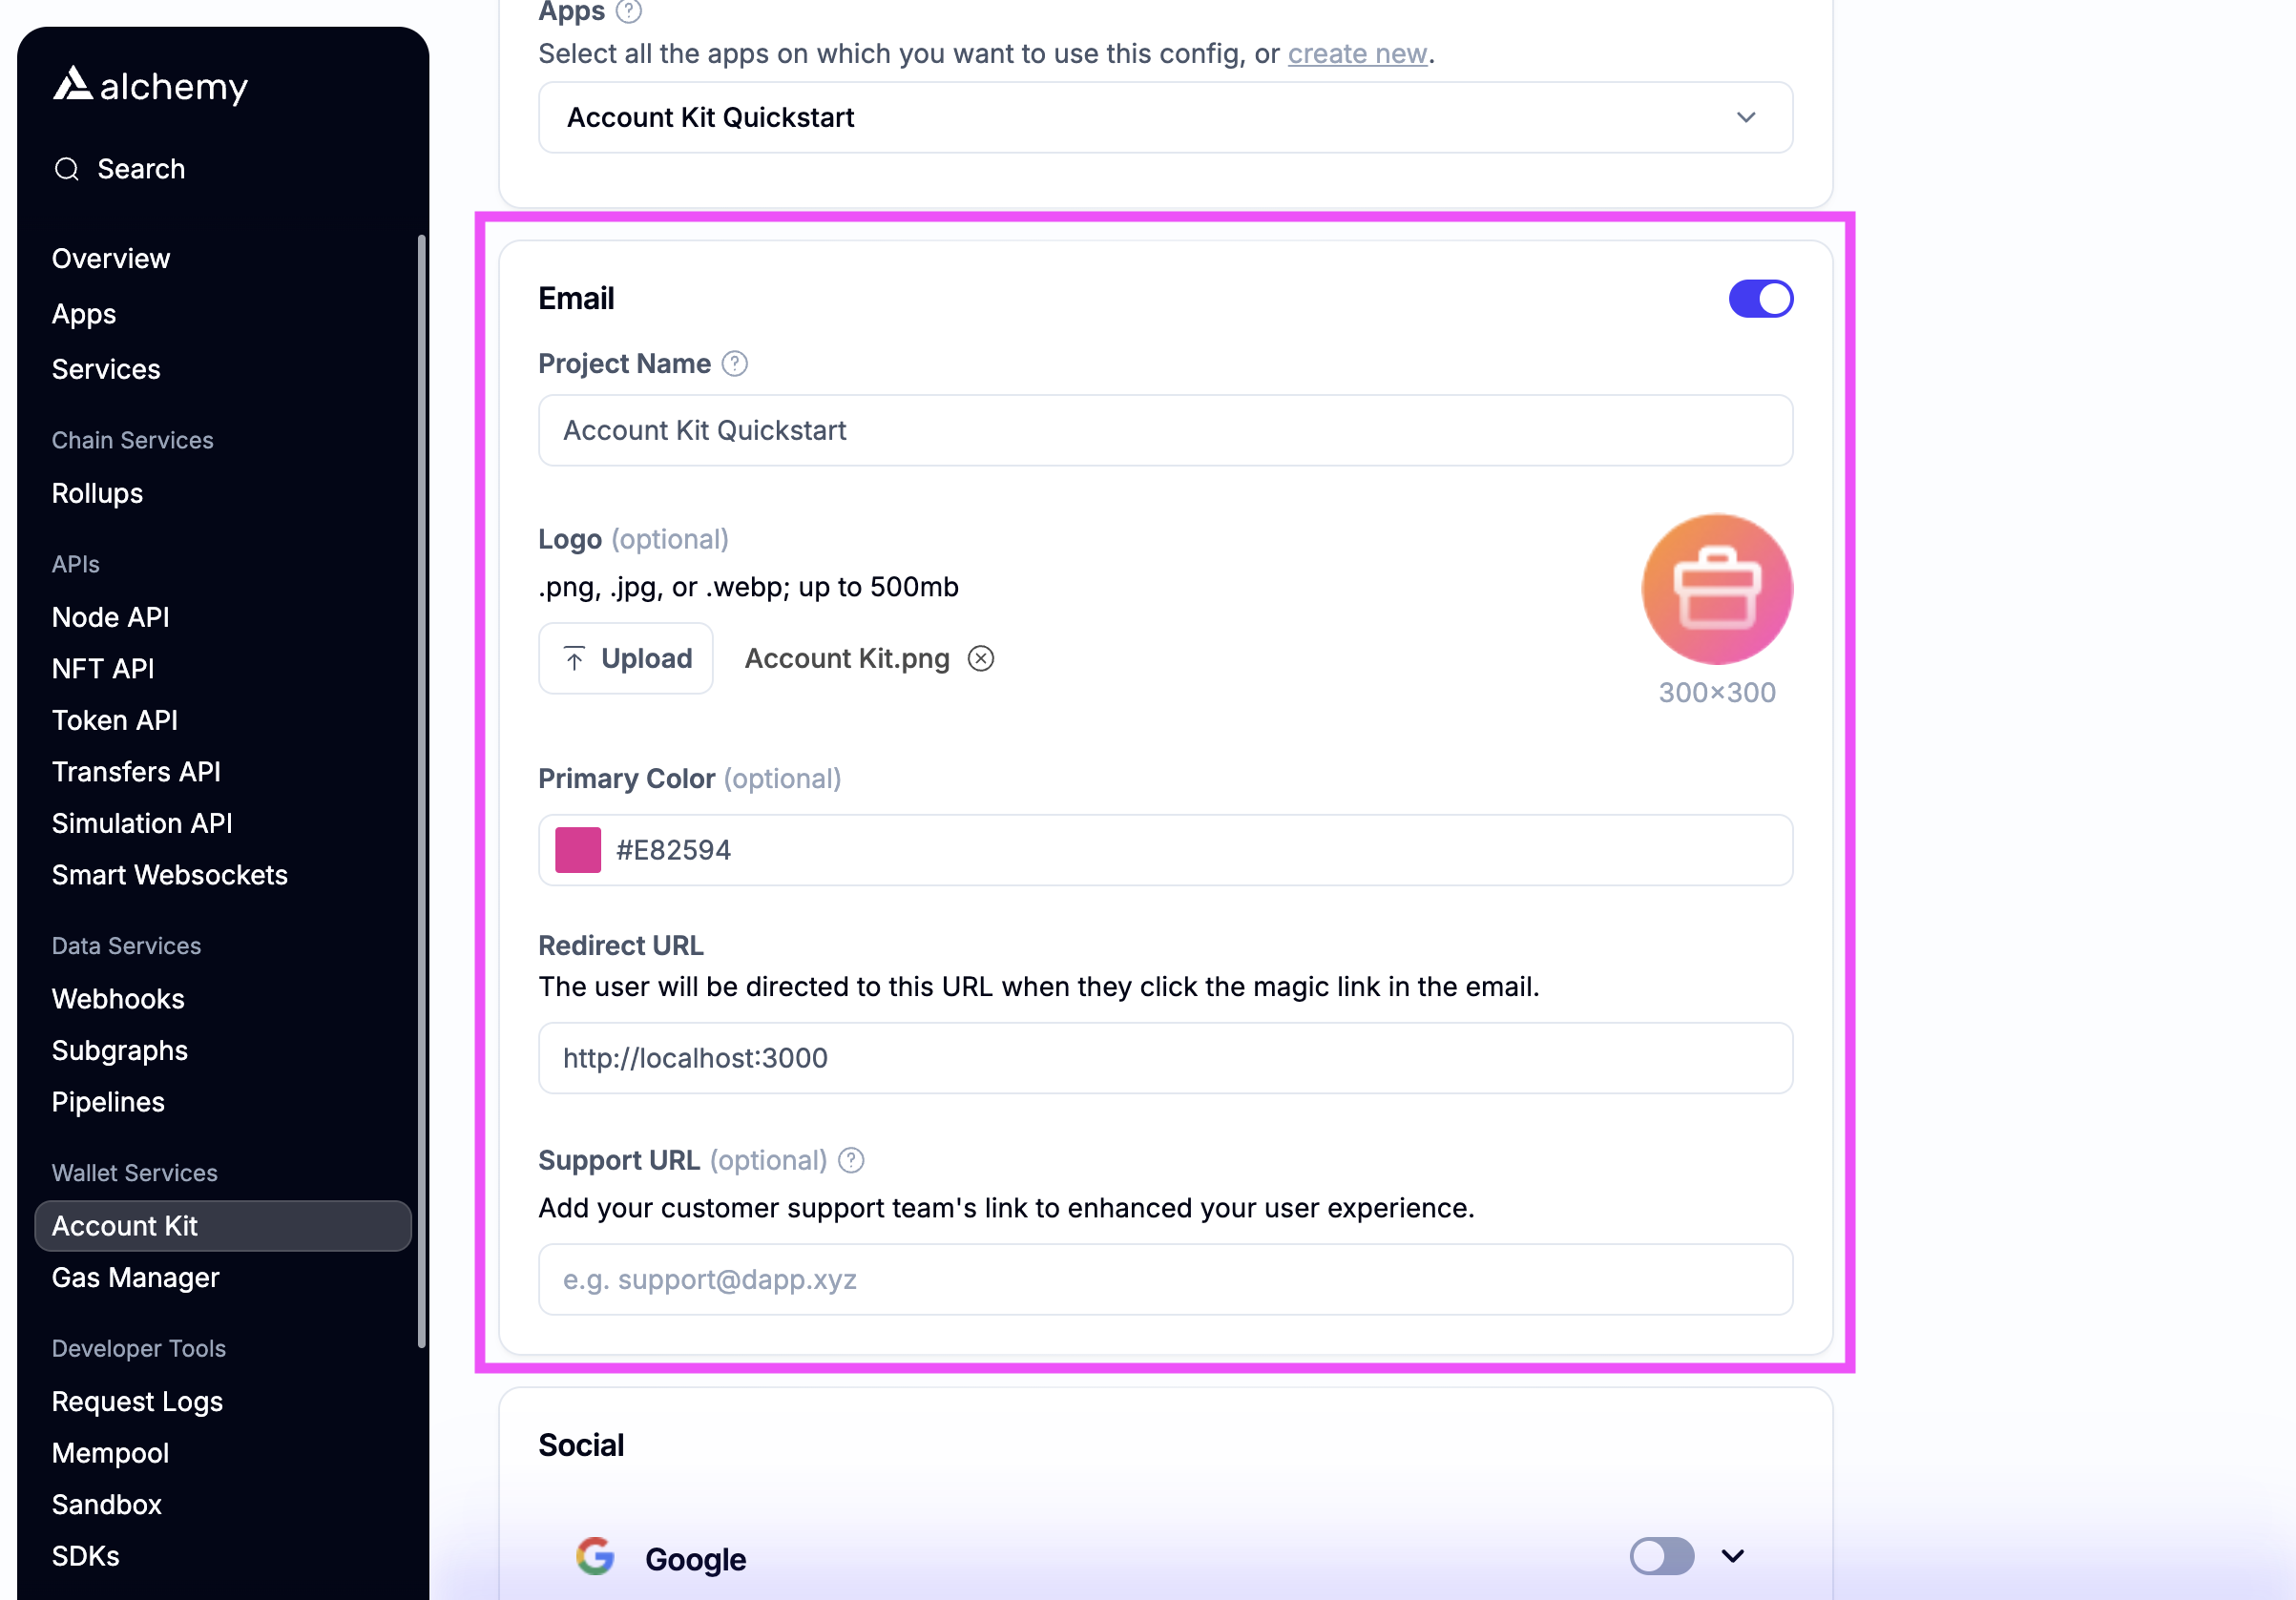
**Email auth**
If you want to use email auth, toggle on email.
* For testing, use [http://localhost:3000](http://localhost:3000/)
as the **Redirect URL** (Note **http** not https)
* The **Redirect URL** is where redirection occurs when using the magic link email flow
* Optionally stylize the email with your brand color and logo.
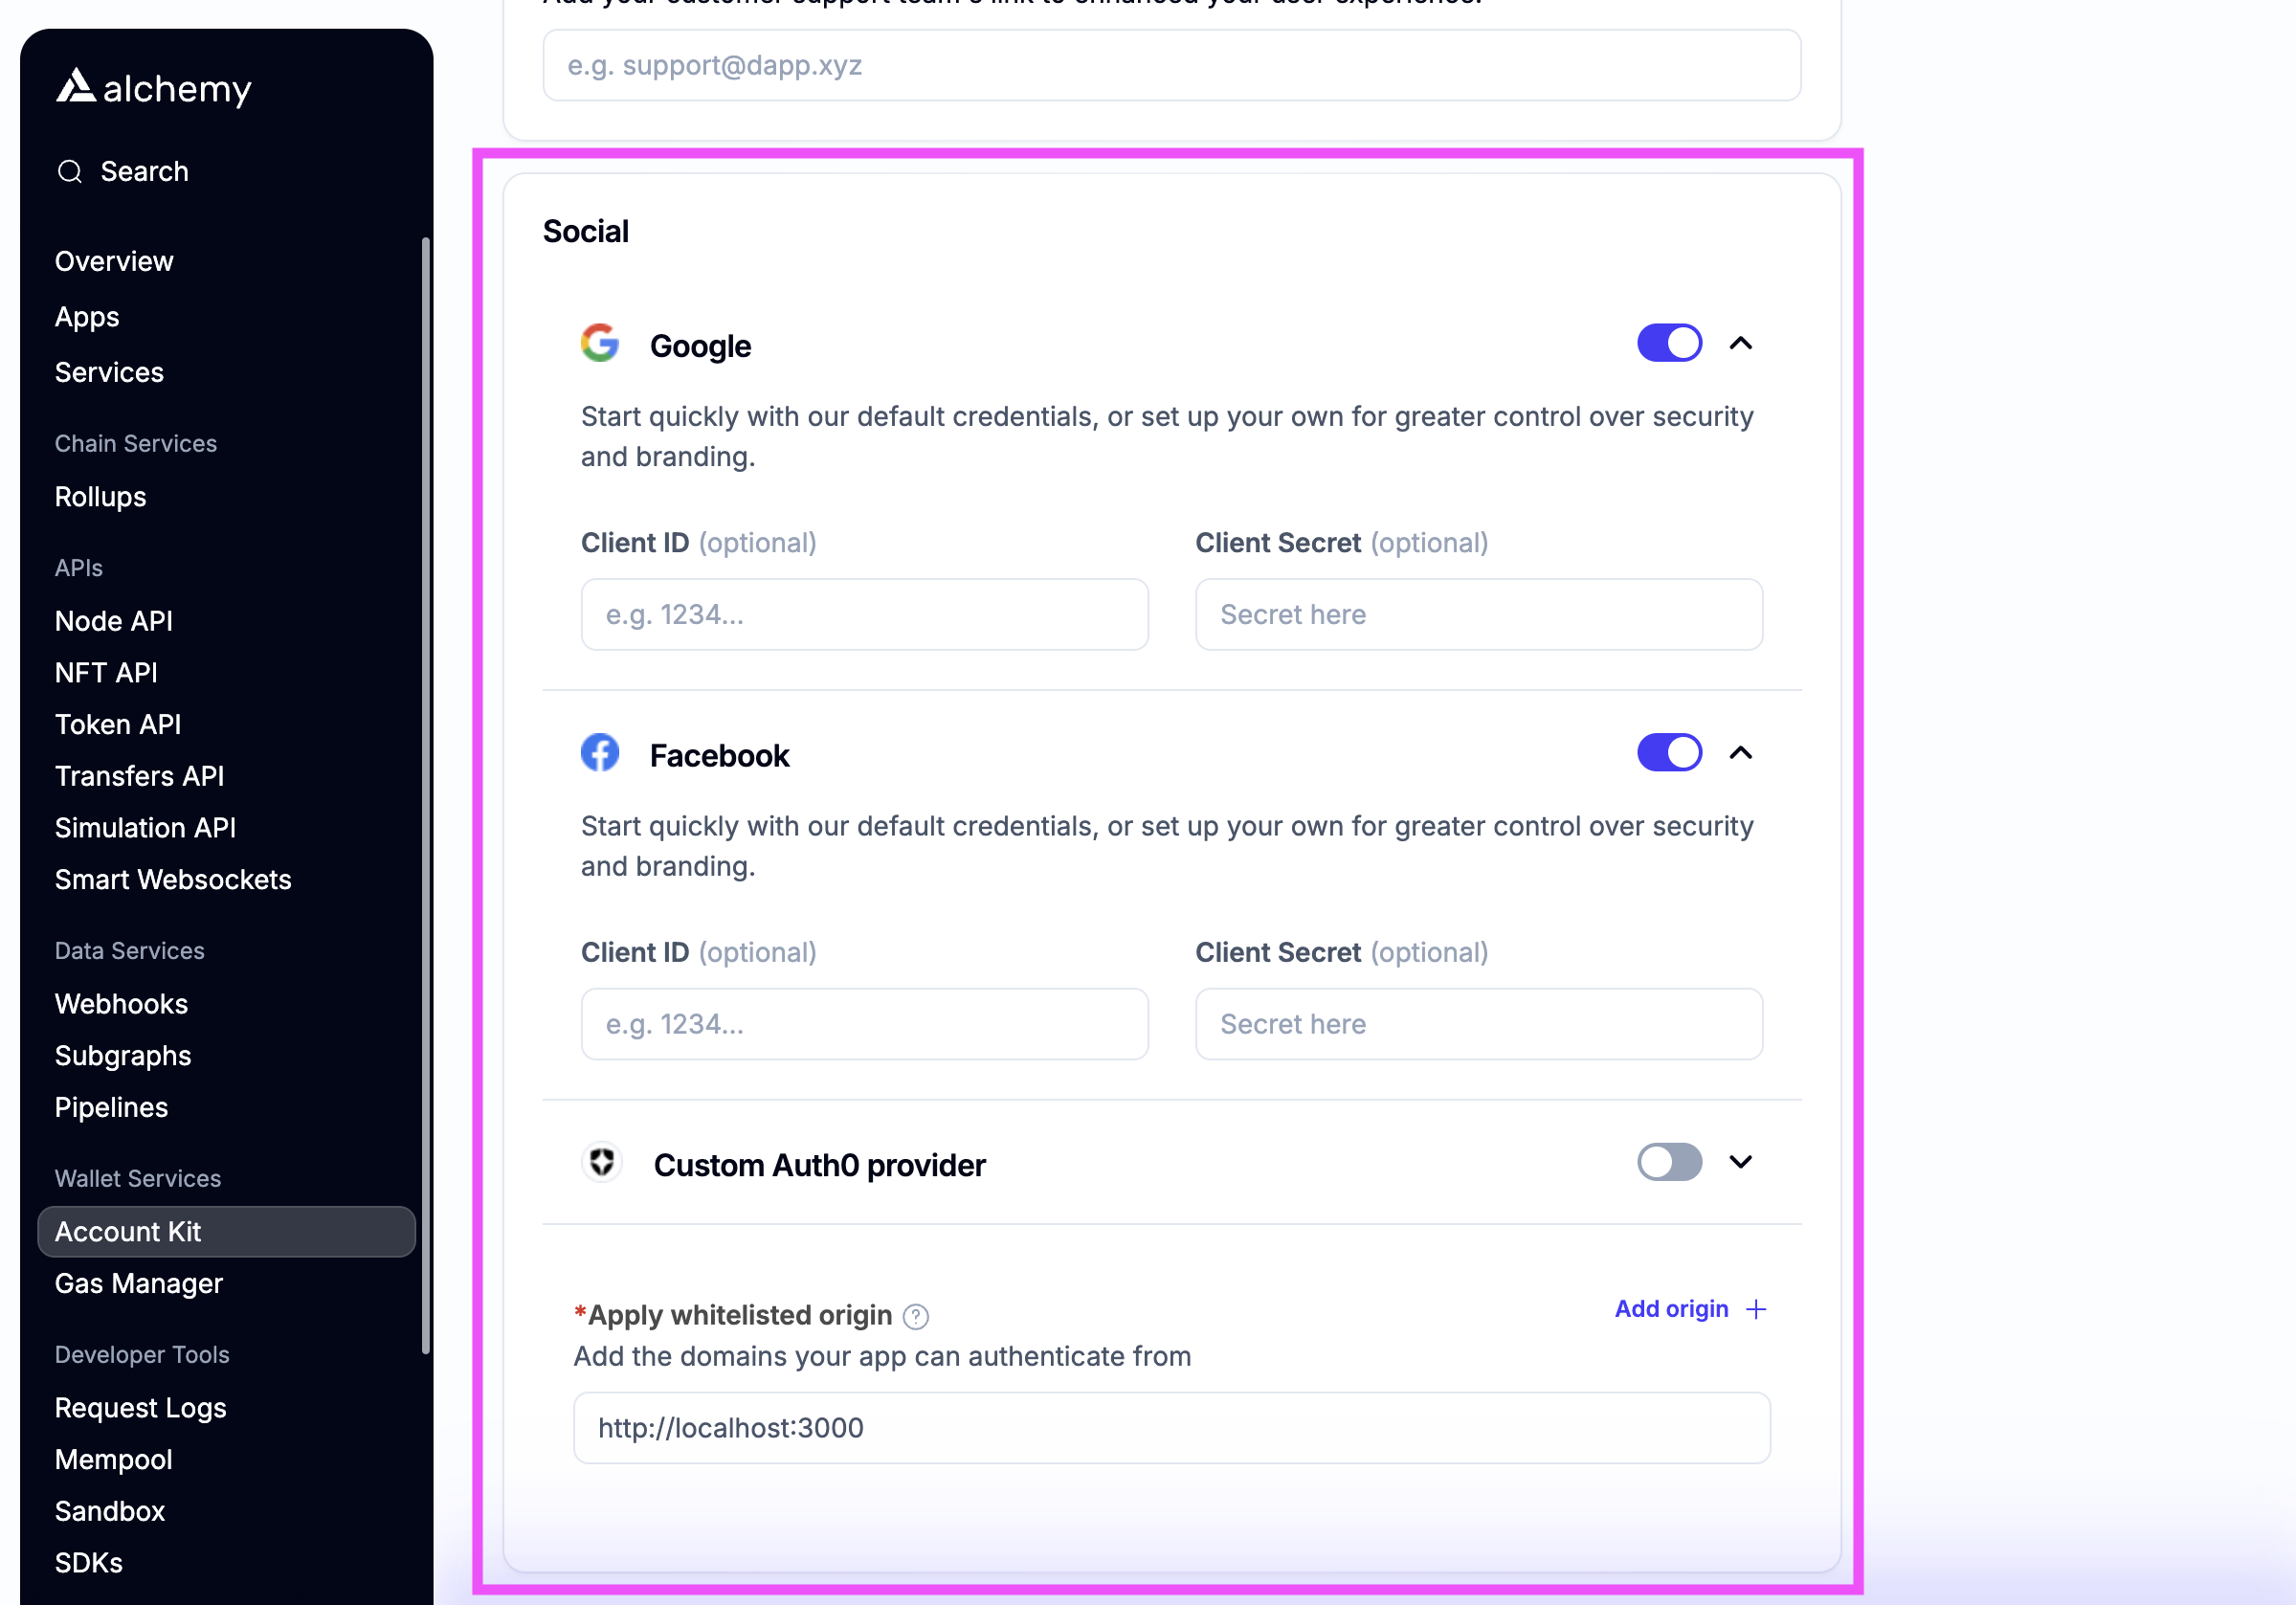
**Social auth**
If you want to enable social login, toggle which auth providers
you want to support.
* For testing, add [http://localhost:3000](http://localhost:3000/) as a **whitelisted origin**
* Add the link that your dApp will be running on to the **whitelisted origin** list
* Optionally enter your own OAuth credentials or use the defaults
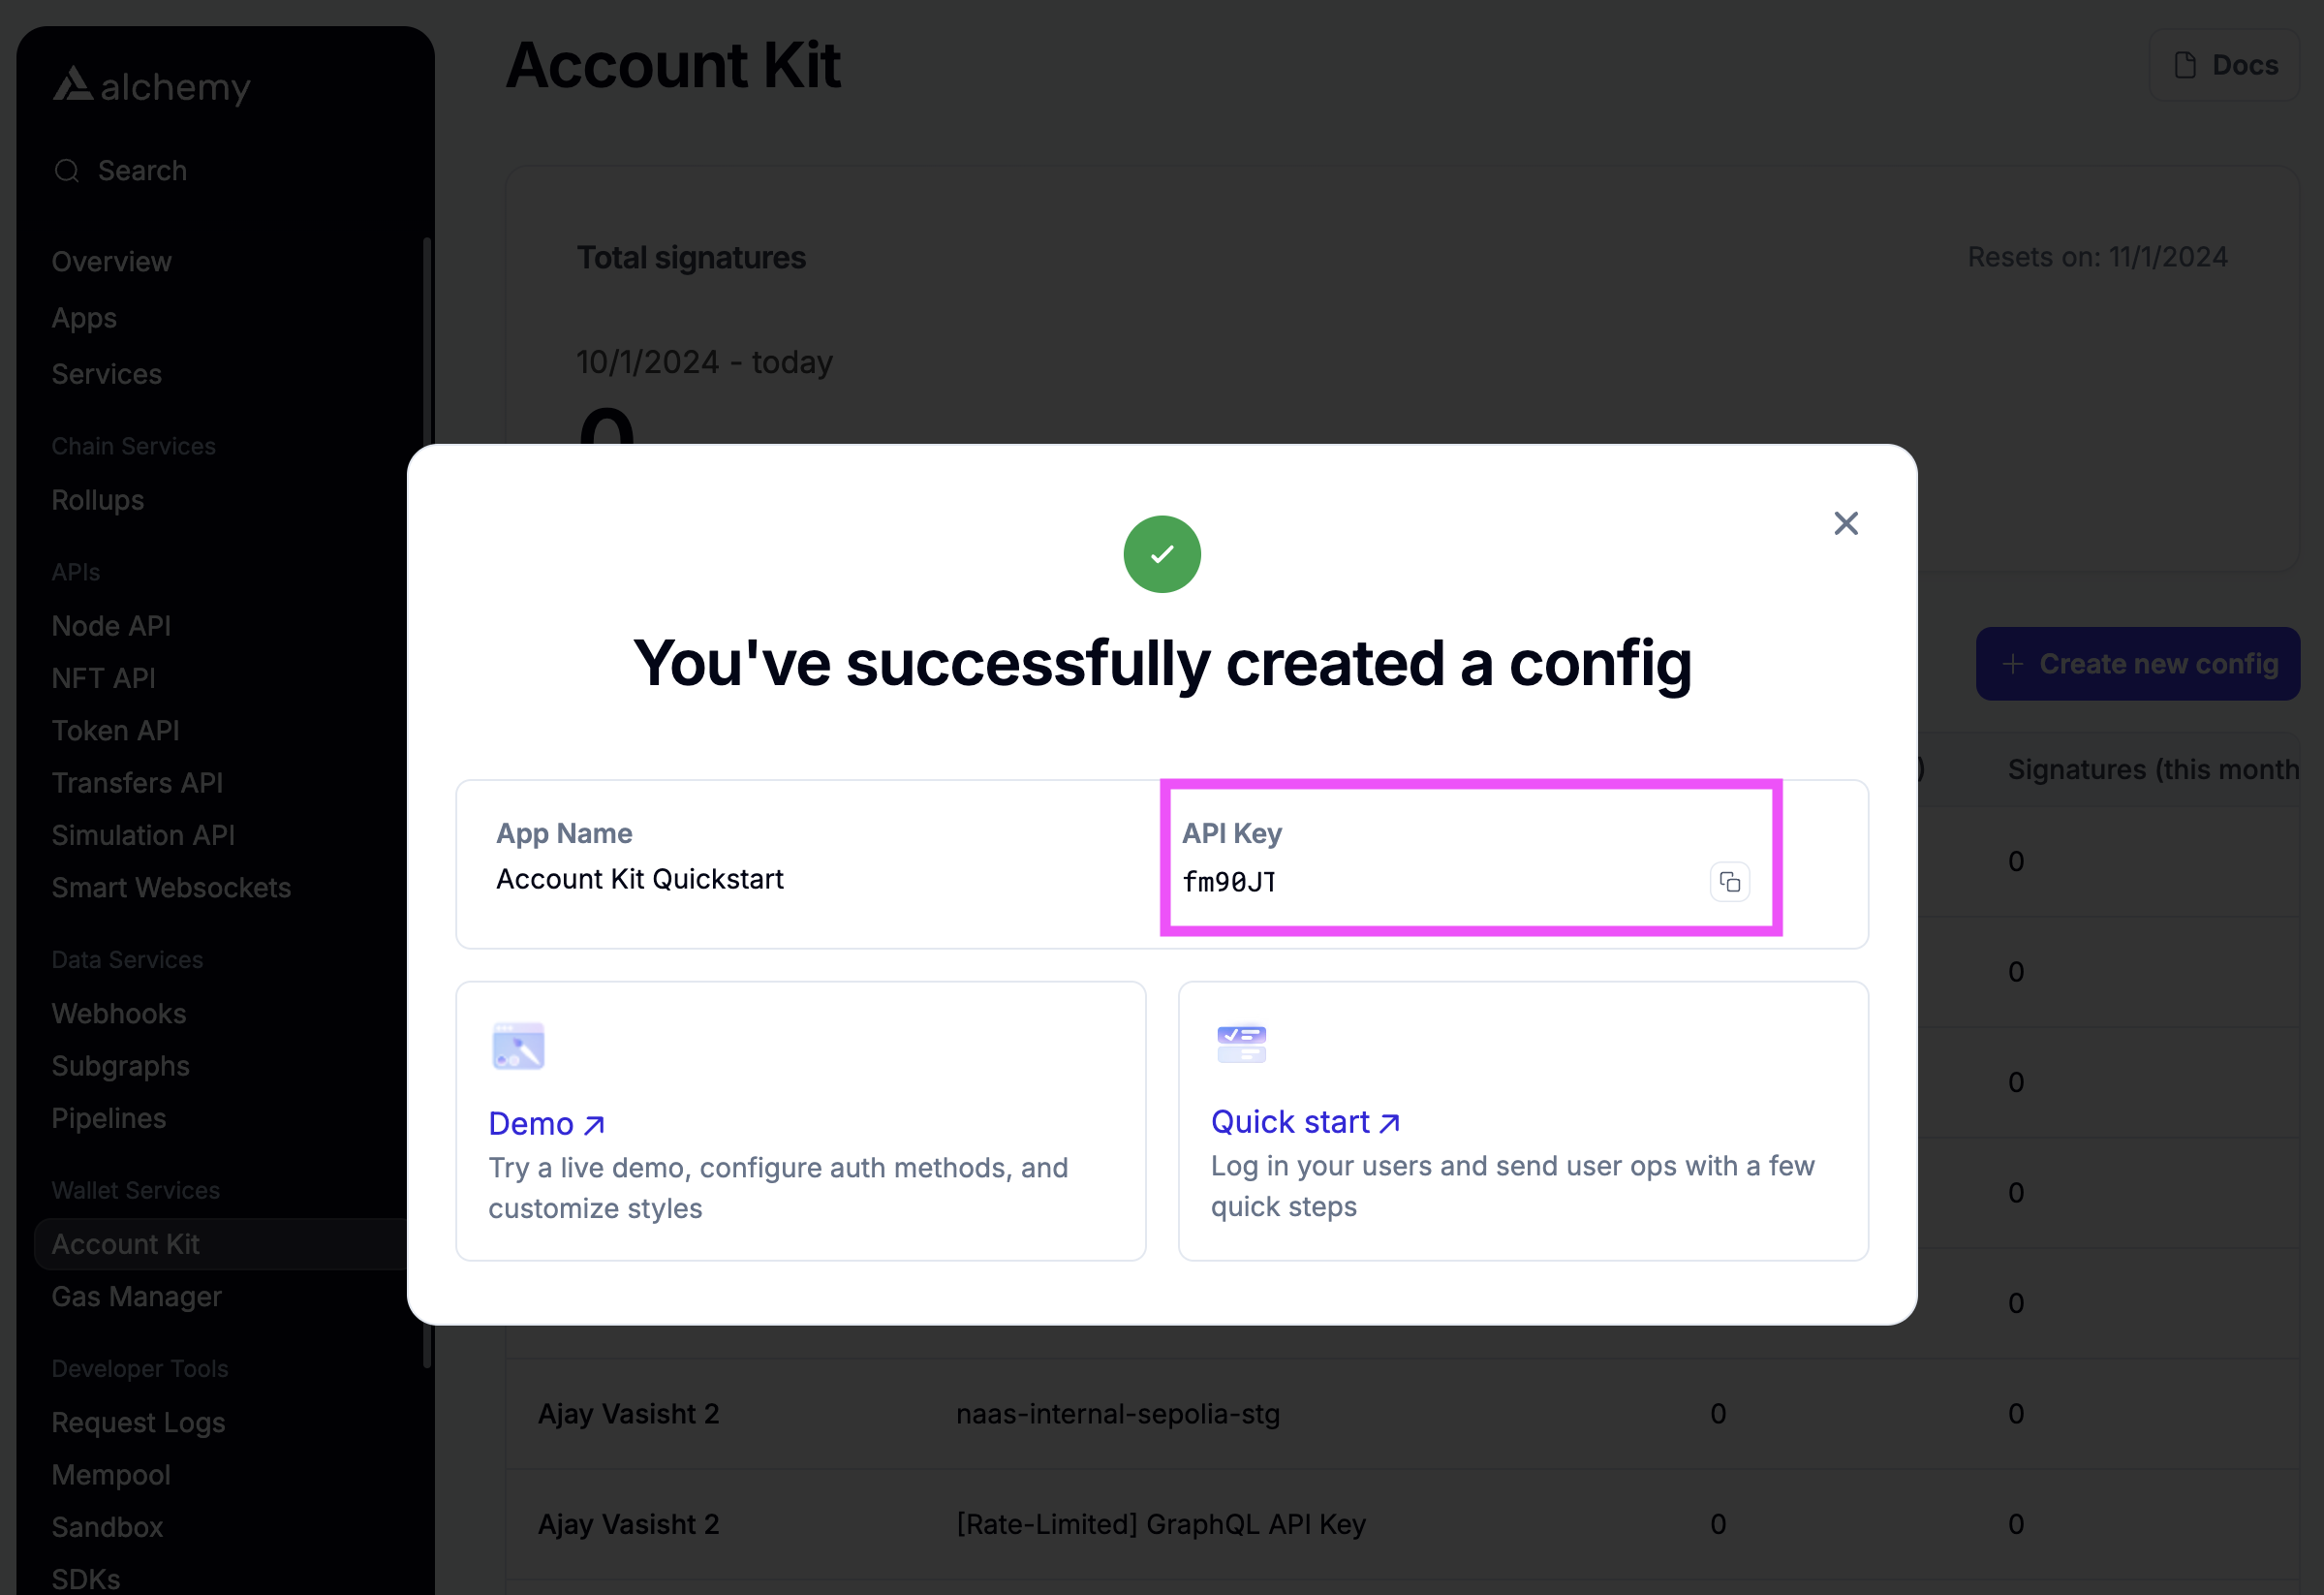
 3. Create the config and copy the **API key**
 ## Install the authentication package
**Prerequisites**
* minimum Typescript version of 5
**Installation**
```bash yarn
yarn add @account-kit/signer
```
```bash npm
yarn add @account-kit/signer
```
## Create an authentication provider instance
```ts signer.ts
import { AlchemyWebSigner } from "@account-kit/signer";
export const signer = new AlchemyWebSigner({
client: {
connection: {
apiKey: "API_KEY",
},
iframeConfig: {
iframeContainerId: "alchemy-signer-iframe-container",
},
},
});
```
## Authenticate a user
Next, authenticate your user before you can use it as an owner on the account.
In this example, email auth is used, but a number of other auth
methods are supported. See the other guides for more examples.
```ts example.ts
import { signer } from "./signer";
const result = await signer.authenticate({
type: "email",
email: "example@mail.com",
});
```
```ts signer.ts
import { AlchemyWebSigner } from "@account-kit/signer";
export const signer = new AlchemyWebSigner({
client: {
connection: {
apiKey: "API_KEY",
},
iframeConfig: {
iframeContainerId: "alchemy-signer-iframe-container",
},
},
});
```
## Use as owner on smart wallet
Now that you have authenticated your user, use the authentication provider as an owner on a smart wallet.
```ts example.ts
import { createLightAccount } from "@account-kit/smart-contracts";
import { sepolia } from "@account-kit/infra";
import { http } from "viem";
import { signer } from "./signer";
const account = await createLightAccount({
signer,
chain: sepolia,
transport: http(`${sepolia.rpcUrls.alchemy.http[0]}/API_KEY`),
});
```
```ts signer.ts
import { AlchemyWebSigner } from "@account-kit/signer";
export const signer = new AlchemyWebSigner({
client: {
connection: {
apiKey: "API_KEY",
},
iframeConfig: {
iframeContainerId: "alchemy-signer-iframe-container",
},
},
});
```
## Install the authentication package
**Prerequisites**
* minimum Typescript version of 5
**Installation**
```bash yarn
yarn add @account-kit/signer
```
```bash npm
yarn add @account-kit/signer
```
## Create an authentication provider instance
```ts signer.ts
import { AlchemyWebSigner } from "@account-kit/signer";
export const signer = new AlchemyWebSigner({
client: {
connection: {
apiKey: "API_KEY",
},
iframeConfig: {
iframeContainerId: "alchemy-signer-iframe-container",
},
},
});
```
## Authenticate a user
Next, authenticate your user before you can use it as an owner on the account.
In this example, email auth is used, but a number of other auth
methods are supported. See the other guides for more examples.
```ts example.ts
import { signer } from "./signer";
const result = await signer.authenticate({
type: "email",
email: "example@mail.com",
});
```
```ts signer.ts
import { AlchemyWebSigner } from "@account-kit/signer";
export const signer = new AlchemyWebSigner({
client: {
connection: {
apiKey: "API_KEY",
},
iframeConfig: {
iframeContainerId: "alchemy-signer-iframe-container",
},
},
});
```
## Use as owner on smart wallet
Now that you have authenticated your user, use the authentication provider as an owner on a smart wallet.
```ts example.ts
import { createLightAccount } from "@account-kit/smart-contracts";
import { sepolia } from "@account-kit/infra";
import { http } from "viem";
import { signer } from "./signer";
const account = await createLightAccount({
signer,
chain: sepolia,
transport: http(`${sepolia.rpcUrls.alchemy.http[0]}/API_KEY`),
});
```
```ts signer.ts
import { AlchemyWebSigner } from "@account-kit/signer";
export const signer = new AlchemyWebSigner({
client: {
connection: {
apiKey: "API_KEY",
},
iframeConfig: {
iframeContainerId: "alchemy-signer-iframe-container",
},
},
});
```