
How to trade tokens on an Ethereum decentralized exchange
Written by Aguchukwu Emmanuel Ebube
Uniswap is an open-source, decentralized crypto exchange platform built on the Ethereum blockchain. It makes use of a model (Automated liquidity protocol) that incentivizes people to become liquidity providers in order to solve the liquidity problem in crypto exchange platforms.
Uniswap currently has over $10.3 billion worth of assets locked in its platform and has also exceeded 1 trillion swaps. In this article, we will be showing you a step-by-step process on how to trade tokens on Uniswap.
1. Download and install MetaMask
There are several wallets compatible with Uniswap, however, we will be making use of metamask in this tutorial.
Go to Metamask, then download and install metamask as a browser extension. Supported browsers include Chrome, FireFox, Brave, Edge, and Opera. For PCs and as an app for mobile phones use Google play for Android or the App Store for iOS.
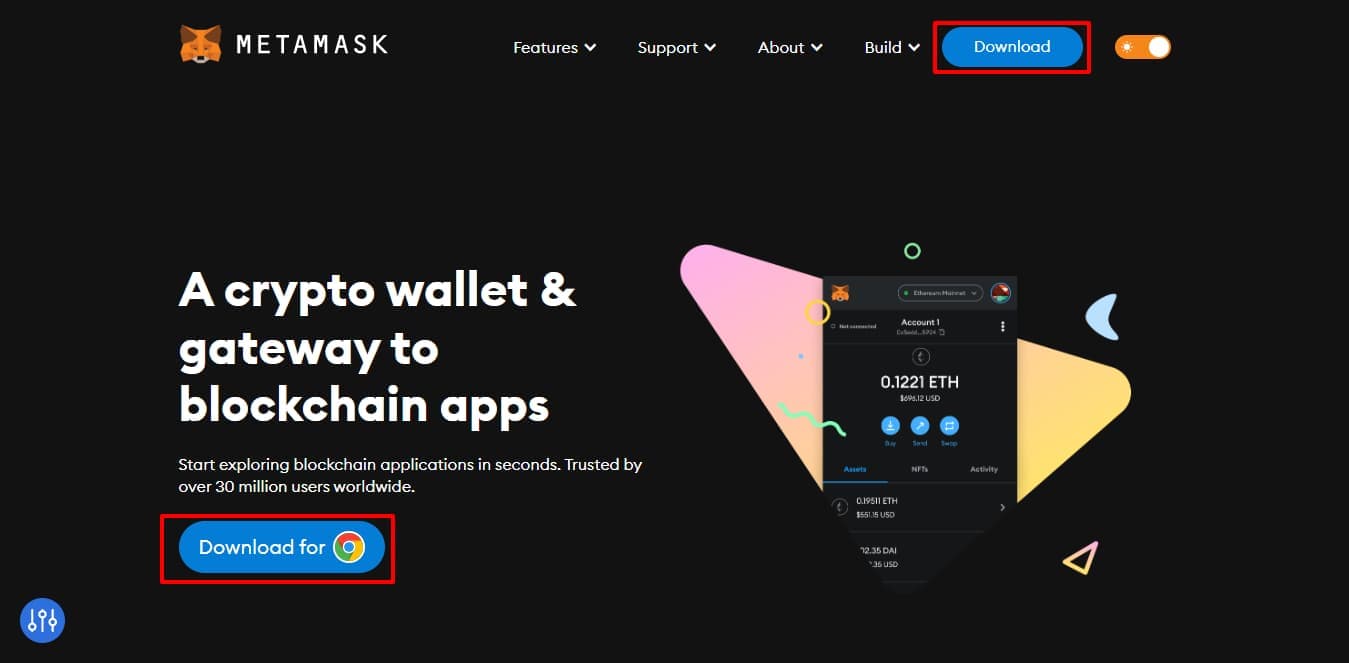
- Create an account and note down your secret recovery phrase.
Note: Never share your recovery phrase with anyone, losing it means losing access to all your funds.
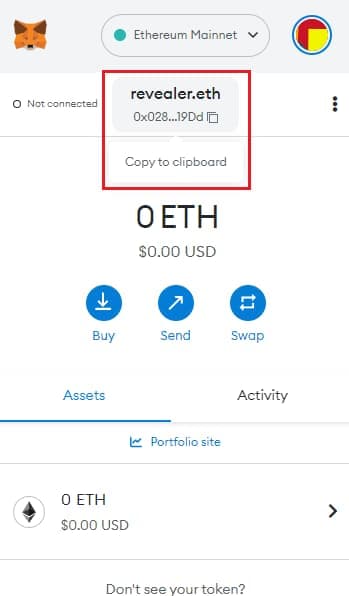
2. Fund your MetaMask wallet
- Copy your Metamask address, and then click on your account address to copy.
-
Buy some ETH and send them to your address to withdraw it.
Note that you can purchase any ERC20 tokens, but we are using ETH because we would need it to pay for gas fees.
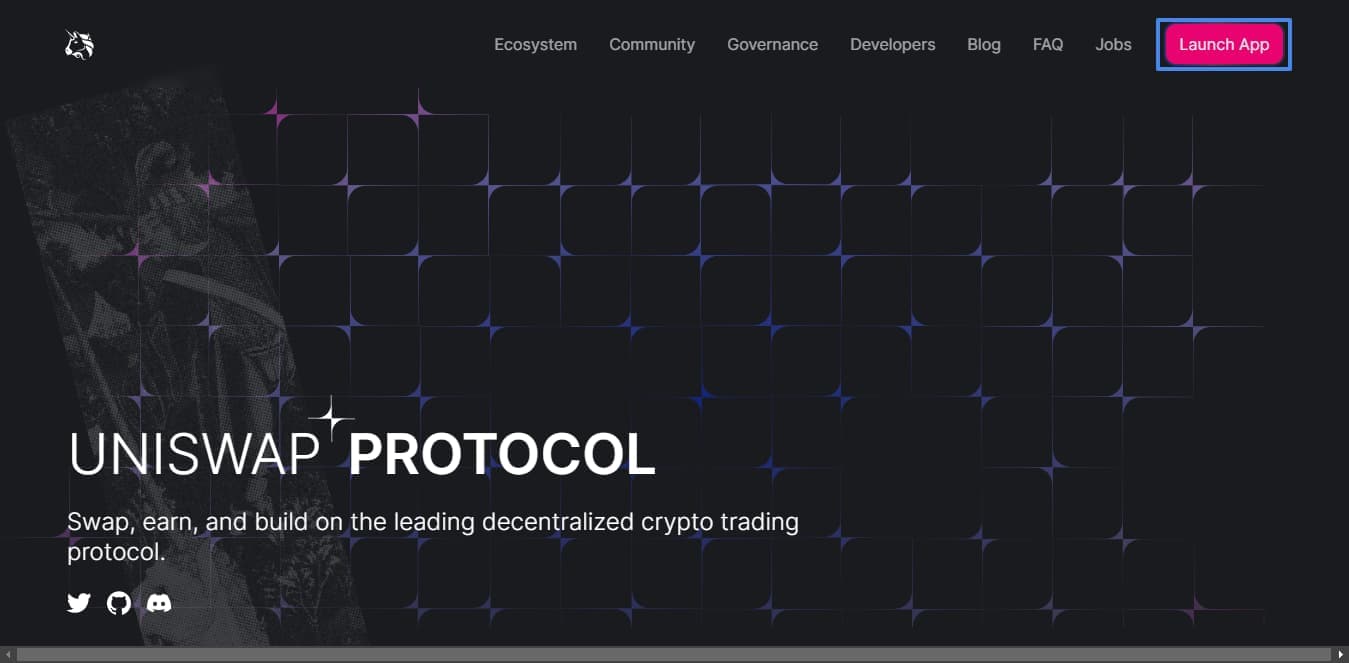
3. Connect your wallet
- Go to Uniswap, then click on the launch App button, this button directs you to an interface to connect your wallet.
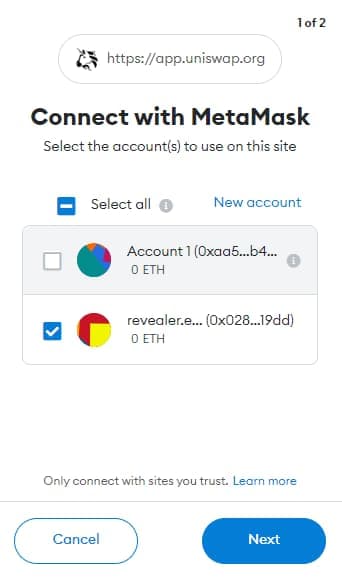
- Click on the connect button to connect your wallet.
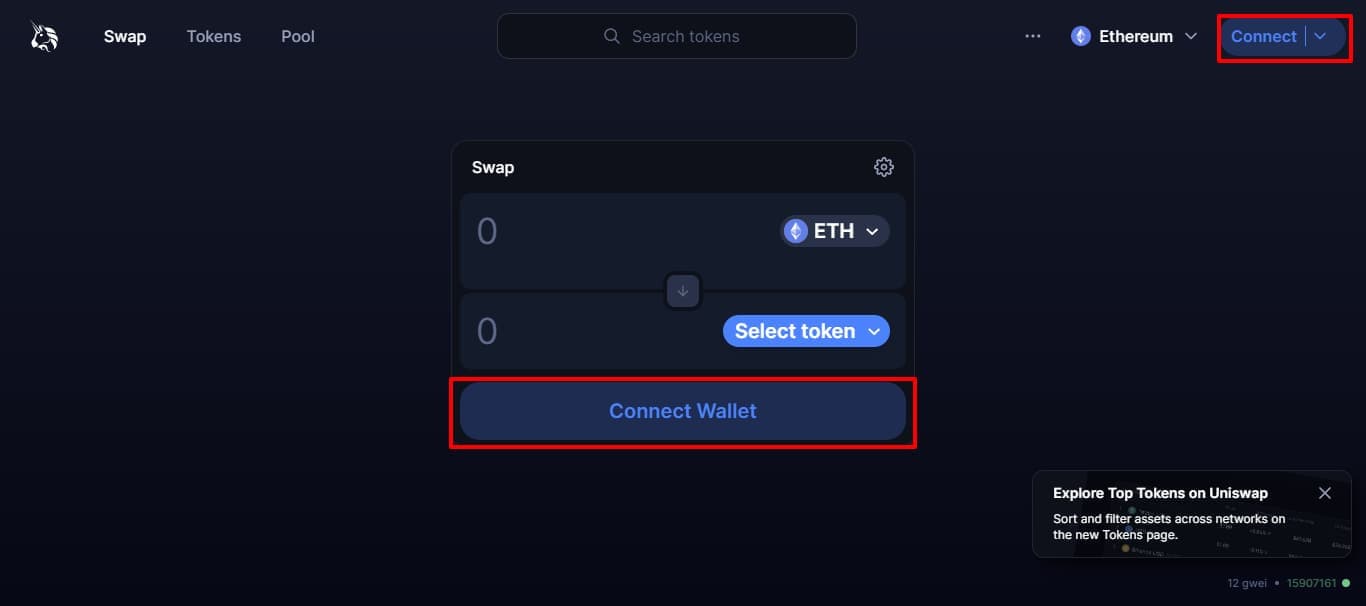
- The connect button will prompt a Metamask notification, to select the accounts you want to give access to Uniswap. Select your desired account.
4. Trade on Uniswap
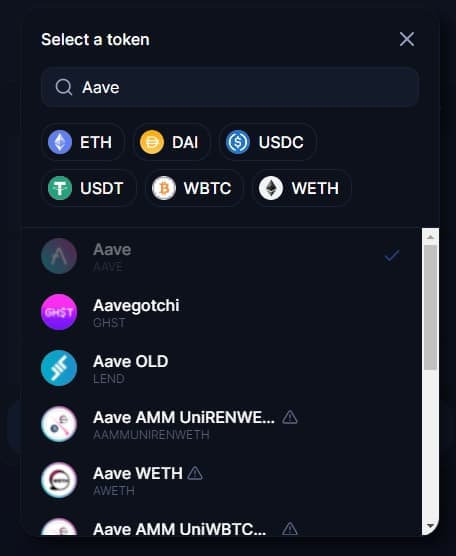
- Select the desired token you wish to swap with ETH.
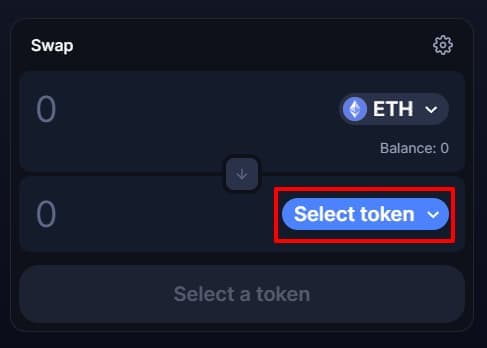
-
Specify the amount of ETH you want to spend, and the amount of tokens you can get automatically shows up. We also get to see the gas fees for the specified amount.
-
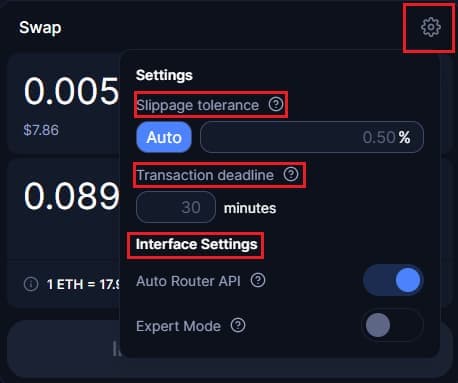
Check your settings: This is not compulsory for every transaction, but is necessary if you want to know the details of your transaction. From the settings, we can see the following:
- The Slipagge tolerance - When the price of the token changes, your transaction will fail if it exceeds the stipulated percentage.
- Transaction deadline - Your transaction shouldn’t exceed the stipulated time.
- User interface settings - Allows you to access other features in the user interface.
- Click on the "Swap" button, and confirm the transaction on your Metamask.
Note that the "Swap" button only shows up when you have a sufficient ETH balance to process the transaction. It might take a few minutes to go through but, after it has gone successfully you should be able to see your balance.
Related Overviews


Build blockchain magic
Alchemy combines the most powerful web3 developer products and tools with resources, community and legendary support.