How to Create a Gasless NFT Minter using AA-SDK, Create Web3 Dapp & Userbase

Learn how to set up a full-stack end-to-end solution that implements account abstraction in order to enable gasless NFT minting.

How to Build a Gasless NFT Minter using Alchemy’s Account Abstraction SDK

Ever wanted to drop an NFT collection where your users do not need to pay gas fees or even own a web3 wallet to mint? Well, look no further!

Please note: this guide is meant to show you the ropes around building AA-enabled dApps and therefore purely for educational purposes. The end-product of this guide should never be used for production without professional auditing.

In this guide, we will walk through the following:

  1. Setting up a NextJS-based application using Create Web3 Dapp
  2. Setting up Userbase in order to have our app have built-in user accounts & authentication without any database setup needed
  3. Deploying an ERC-721 contract to the Sepolia test network
  4. Using the Alchemy Account Abstraction SDK to rig up our application to gasless web3 interactions with the ERC-721 contract (ie, gasless minting, burning and transfering), all thanks to Alchemy’s Gas Manager Services.

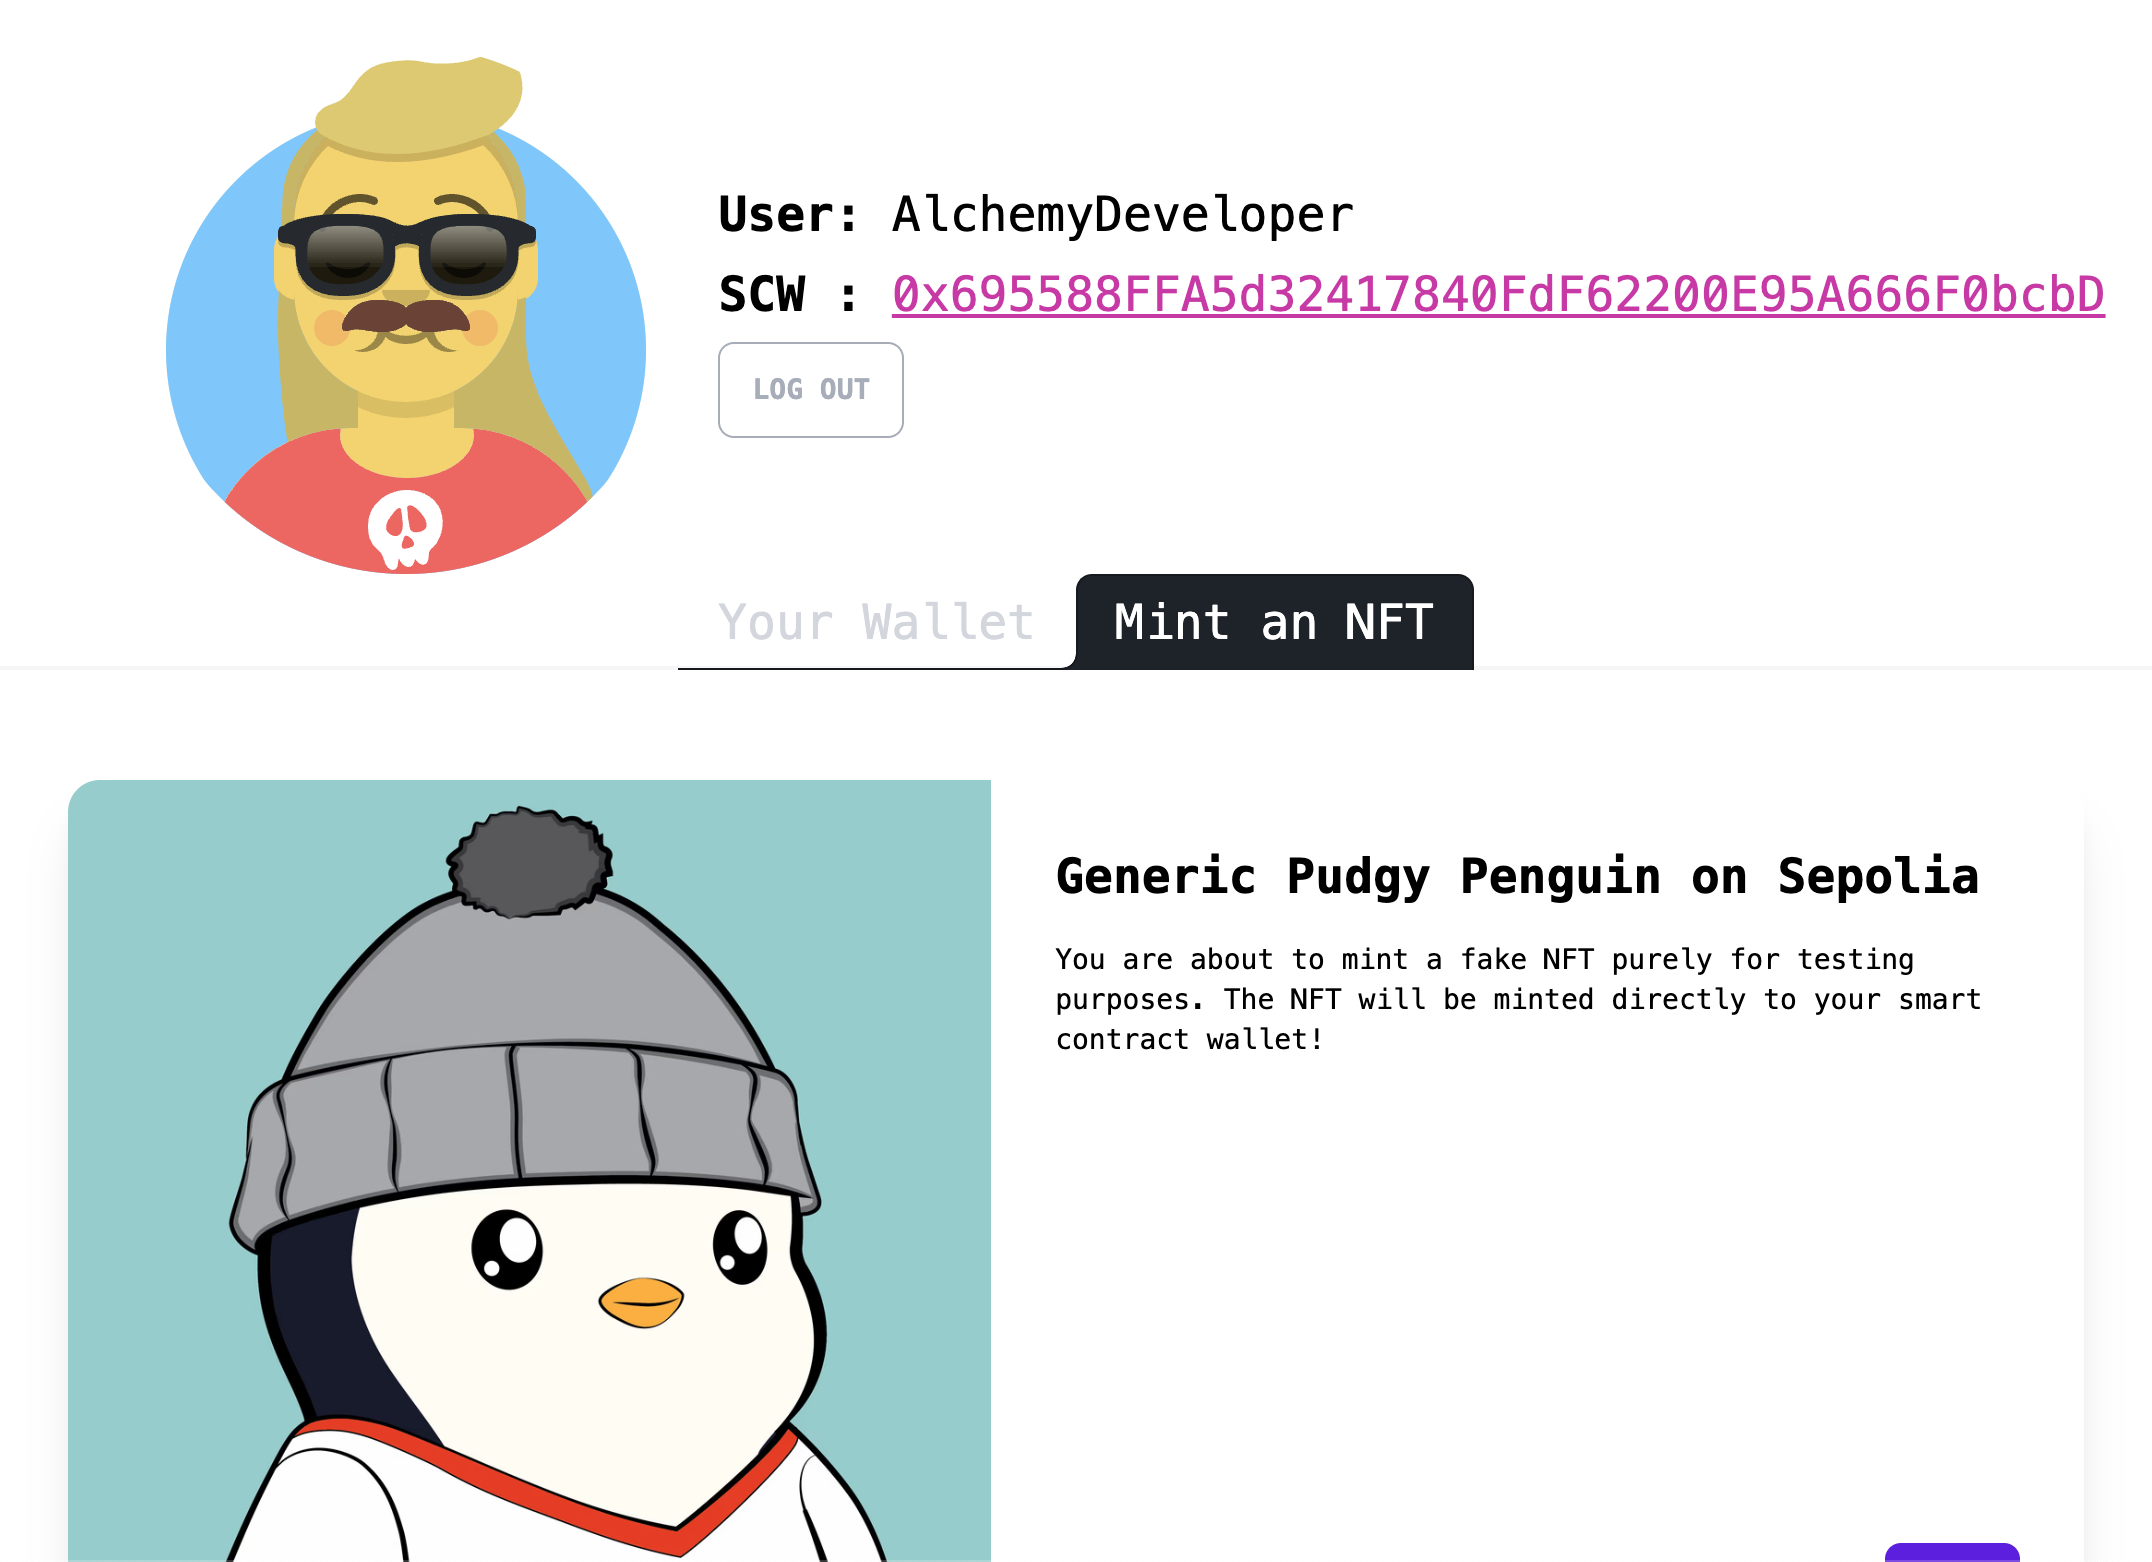
👀 Your end-product will look a little like this:

All of the code in this guide is available in this Github repo, please feel free to fork and modify!

Pre-Requisities

  • Node.js version 16.14.0 or higher.
  • This project will make use of Create Web3 Dapp, a web3-enabled wrapper of Create Next App. ⚠️ Please note: Create Web3 Dapp ships out of the box using NextJS 13 which means the project’s main folder is /app instead of /pages.

Step 1: Local Project Setup

Create Web3 Dapp Setup

Let’s get to it! First up, let’s set up our local development environment…

  1. Open a terminal and navigate to your preferred directory for local development - for the purposes of this guide, we’ll use ~/Desktop/my-aa-project/
  2. Once in the /my-aa-project directory, run npx create-web3-dapp@latest
  3. For the initialization wizard, please choose the following options:
  • Project name: gasless-nft-minter
  • Choose how to start: Boilerplate dapp
  • Choose Typescript or Javascript: Typescript
  • Choose your blockchain development environment: Skip
  • Login to your Alchemy account (or sign up for one) to acquire an API key
Note: please be mindful of the application you use to create your Alchemy API key - you’ll need to re-visit this in Step #2!
  1. As it should say in your terminal, run cd gasless-nft-minter and then run npm run dev

Nice! You just used Create Web3 Dapp to startup your local development environment with important dependencies, out-of-the-box, such as:

  • viem: viem delivers a great developer experience through modular and composable APIs, comprehensive documentation, and automatic type safety and inference.
  • ConnectKit: ConnectKit is a powerful React component library for connecting a wallet to your dApp. It supports the most popular connectors and chains, and provides a beautiful, seamless experience.
  • wagmi: wagmi is a collection of React Hooks containing everything you need to start working with Ethereum. wagmi makes it easy to “Connect Wallet,” display ENS and balance information, sign messages, interact with contracts, and much more — all with caching, request deduplication, and persistence.
  • and more!

ConnectKit Wallet Setup

Even though we won’t be building anything that interfaces with a web3 browser wallet in this guide, let’s still make sure we plug in the ConnectKit API key so that we don’t get errors - and in case, you DO want to add web3

  1. Go to https://walletconnect.com/
  2. Create an account and go to the Dashboard
  3. Select + New Project
  4. Copy the Project ID
  5. Open your project’s .env.local file and add the following variable:
.env
1CONNECT_KIT_PROJECT_ID=<PASTE-YOUR-WALLET-CONNECT-APP-ID-HERE>
  1. Save the file! Now, go into you your project’s layout.tsx and make sure to change line 10 so that it receives the variable you just set up.

Your config object should look like this:

ts
1const config = createConfig(
2 getDefaultConfig({
3 // Required API Keys
4 alchemyId: process.env.ALCHEMY_API_KEY,
5 walletConnectProjectId: process.env.CONNECT_KIT_PROJECT_ID!,
6 chains: [sepolia],
7
8 // Required
9 appName: "My Gasless NFT Minter",
10 })
11);

Typescript @common Setup

One thing that’ll make your development flow 100x easier is adding @common folder pathing. This allows you to import components between files without having to explicitly type the path to the component.

All you need to do:

  1. In your tsconfig.json file, replace lines 22-24, with:
json
1"baseUrl": "./",
2"paths": {
3 "@common/*": ["common/*"],
4 "@public/*": ["public/*"]
5}
  1. In your project’s root folder, create a new folder called common

Sweet! Now we can create our components in the /common folder and easily import them across our app! 🏗️

Step 2: Set Up A Gas Policy on Alchemy + Install Styling Dependencies

Thanks to Alchemy’s Gas Manager Coverage API, you are able to create gas policies to build applications with “gasless” features - meaning: your users can interact and perform typical web3 actions such as owning, minting, burning and transfering an NFT - without users having to pay gas fees. This type of infrastructure can be super powerful depending on your use case.

Since this is an AA-enabled application, users will be represented as smart contract wallets - and we will choose to sponsor the minting of an NFT user operation for them! Let’s set up a gas policy to sponsor our users and provide them the greatest UX ever! 🔥

  1. Go to https://www.alchemy.com/ and sign in to your account

drawer

  1. In the left sidebar, select Account Abstraction and once the menu opens, select Gas Manager
  2. Once you are in the Gas Manager page, select the Create new policy button

button

  1. For the Policy details, fill in the following:
  • Policy Name: Gas Fee Sponsorship for my Gasless NFT Minter App
  • For App: Choose the app attached to the Alchemy API key you used in Step #1!
  • Select Next

ui

  1. For the Spending rules, fill in the following:

form

  • Select Next

Since our app will strictly be on Sepolia, these don’t really matter but are still good safeguards to input.

  1. For the Access controls, simply select Next
  2. For the Expiry and duration, select the following (ie, end the policy effective 1 month from today’s date AND make user op signatures valid for 10 minutes after they are sent):

policy1

  1. Lastly select Review Policy and then Publish Policy

  2. Once you are routed to your dashboard, make sure to Activate your new policy! Your policy should look something like this:

policy

Nice! Now, the Alchemy API key you have in your project’s .env file is directly tied to a gas policy to sponsor user operations.

Add the Gas Policy Id to Your .env.local File

In the Alchemy dashboard, where you just created your Gas Manager Policy, you’ll need to copy-paste the Policy ID into your project:

  1. Open your project’s .env.local file and create the following variable:
.env
1SEPOLIA_PAYMASTER_POLICY_ID=<COPY-PASTE-YOUR-GAS-POLICY-ID-HERE>
  1. Save your file!

Sweet. We’re all done with gas policy setup! Let’s add some styling dependencies to our project now… ⬇️

Styling: Tailwind CSS & DaisyUI

In order for this app to look pretty, let’s install TailwindCSS and DaisyUI, just in case!

Tailwind CSS

This step is exactly the same as the official instructions EXCEPT, the tailwind.config.css here is a bit different to account for our use of @common folder.

  1. In your project’s root folder, run npm install -D tailwindcss postcss autoprefixer daisyui@latest
  2. Then, run npx tailwindcss init -p

You should see your terminal output:

$Created Tailwind CSS config file: tailwind.config.js
>Created PostCSS config file: postcss.config.js
  1. Copy-paste the following into your app’s newly-created tailwind.config.js file:
js
1/** @type {import('tailwindcss').Config} */
2module.exports = {
3 content: [
4 "./app/**/*.{js,ts,jsx,tsx,mdx}",
5 "./common/**/*.{js,ts,jsx,tsx,mdx}",
6 "./public/**/*.{js,ts,jsx,tsx,mdx}",
7 ],
8 theme: {
9 extend: {},
10 },
11 plugins: [require("daisyui")],
12}
  1. Lastly, copy-paste the following into the very top of your app’s globals.css file:
css
1@tailwind base;
2@tailwind components;
3@tailwind utilities;

Daisy UI

This step is EXACTLY the same as the official DaisyUI installation instructions.

  1. Run npm i -D daisyui@latest
  2. In your newly-created tailwind.config.css, add the following key to the module.exports in that file:

You’re done! Now you have access to cutting-edge styling libraries - this will be great in order to deliver better UX! 🤩

Step 3: Set Up Authentication

One of the first things you’ll need in an AA-enabled application is a way to authenticate/map a real-life user record to an account on your app. Since our goal is to NOT use web3 browser wallets, we need to rely on a more traditional way to authenticate a user.

The authentication setup we will use is simplistic but powerful - and NOT secure. Remember, this guide is for educational purposes and should never be used in a production setting!

Set Up Userbase Account

Let’s set up our own authentication with Userbase!

  1. First of all, run npm i userbase-js in your terminal
  2. Now, go to https://userbase.com/ and create an account
  3. Once you sign in, you should see a default Starter App
  4. Copy the Starter App’s App Id
  5. Go to your .env.local file, create a variable and paste your app id, like this:
.env.local
1NEXT_PUBLIC_USERBASE_APP_ID=<PASTE_YOUR_STARTER_APP_ID>

Note: In order to expose the app ID value to the client-side, you must add NEXT_PUBLIC to the variable.

  1. Next, go back to Userbase and go to the Account tab in the navbar
  2. Scroll down on the page till you see the Access Tokens section
  3. Type in your password and write get-userbase-user for the label, then hit Generate Access Token
  4. Once you have your access token, go back to your .env.local and add a variable again like this:
.env.local
1USERBASE_ACCESS_TOKEN=<PASTE_YOUR_GENERATED_ACCESS_TOKEN>

Sweet! You’ve set up everything needed on the Userbase side, now let’s continue building our auth implementation! 💪

Why did we use Userbase? Because it’s a quick, powerful and easy solution for managing user accounts without needing to set up bulky servers or databases!

Set Up AuthProvider

AuthProvider component

  1. In your project’s /common folder, create a new file called AuthProvider.tsx and copy-paste the following:
typescript
1import {
2 ReactNode,
3 createContext,
4 useContext,
5 useEffect,
6 useState,
7} from "react";
8import userbase from "userbase-js";
9
10interface User {
11username: string;
12isLoggedIn: boolean;
13userId: string;
14scwAddress?: string;
15}
16
17interface AuthContextType {
18user: User | null;
19login: (user: User) => void;
20logout: () => void;
21}
22
23const AuthContext = createContext<AuthContextType | undefined>(undefined);
24
25export function useAuth(): AuthContextType {
26const context = useContext(AuthContext);
27if (!context) {
28throw new Error("useAuth must be used within an AuthProvider");
29}
30return context;
31}
32
33interface AuthProviderProps {
34children: ReactNode;
35}
36
37export function AuthProvider({ children }: AuthProviderProps) {
38const [user, setUser] = useState<User | null>(null);
39useEffect(() => {
40userbase
41.init({
42appId: process.env.NEXT_PUBLIC_USERBASE_APP_ID!,
43})
44.then((session: any) => {
45// SDK initialized successfully
46
47 if (session.user) {
48 // there is a valid active session
49 console.log(
50 `Userbase login succesful. ✅ Welcome, ${session.user.username}!`
51 );
52 console.log(session.user);
53 const userInfo = {
54 username: session.user.username,
55 isLoggedIn: true,
56 userId: session.user.userId,
57 scwAddress: session.user.profile.scwAddress,
58 };
59 login(userInfo);
60 console.log(
61 "Logged out in the authprovider, here is the user " + user?.username
62 );
63 }
64 })
65 .catch((e: any) => console.error(e));
66 }, []);
67
68 const login = (user: User) => {
69 setUser(user);
70 };
71
72 const logout = () => {
73 setUser(null);
74 };
75
76 return (
77 <AuthContext.Provider value={{ user, login, logout }}>
78 {children}
79 </AuthContext.Provider>
80 );
81
82}

Use AuthProvider component in layout.tsx

In order for your AuthProvider component to take effect on your app, follow these steps:

  1. Go to your project’s layout.tsx
  2. Delete lines 4-5, we don’t need them! (feel free to implement them yourself!)
  3. After line 10, add the following:
javascript
$chains: [sepolia],
  1. Remember to add the sepolia import from wagmi on line 4:
javascript
1 import {WagmiConfig, createConfig, sepolia} from "wagmi";

This is to protect our users! We want to only allow use of this app exclusively on the Sepolia test network.

  1. Then, add the following import at the top of the file (but not above the 'use client' statement):
javascript
1import {AuthProvider} from "@common/AuthProvider";
  1. Now, wrap your entire RootLayout export in the AuthProvider component you just imported, it should look like this:

Remember to remove the <Navbar> and <Footer> components!

javascript
1<html lang="en">
2 <AuthProvider>
3 <WagmiConfig config={config}>
4 <ConnectKitProvider mode="dark">
5 <body>
6 <div
7 style={{
8 display: "flex",
9 flexDirection: "column",
10 minHeight: "105vh",
11 }}
12 >
13 <div style={{ flexGrow: 1 }}>{children}</div>
14 </div>
15 </body>
16 </ConnectKitProvider>
17 </WagmiConfig>
18 </AuthProvider>
19</html>

Your application, and any of its components, now has access to user authentication state - nice! 🔥

Step 3: Set Up Sign Up / Login Routes

Now, let’s use NextJS 13 /app infrastructure to set up some routes! This section is heavy so get ready! 🧗‍♂️

Sign Up

  1. Run npm i @noble/secp256k1
  2. Create a new folder in the /app folder called /sign-up and then in that folder create a file called page.tsx

This is how you create routes in NextJS 13! By doing the above step, your app will now expose the following route: localhost:3000/sign-up and render whatever component you put inside page.tsx

  1. In the /sign-up/page.tsx file, copy-paste the following code:
tsx
1"use client";
2import "../globals.css";
3import * as secp from "@noble/secp256k1";
4import { useAuth } from "@common/AuthProvider";
5import Loader from "@common/utils/Loader";
6import { useRouter } from "next/navigation";
7import { useEffect, useState } from "react";
8import { publicClient } from "@common/utils/client";
9import simpleFactoryAbi from "@common/utils/SimpleAccountFactory.json";
10import userbase from "userbase-js";
11
12export default function SignupForm() {
13 const { user, login } = useAuth();
14 const [username, setUsername] = useState("");
15 const [password, setPassword] = useState("");
16 const [error, setError] = useState<string | null>(null);
17 const [isLoading, setIsLoading] = useState(false);
18 const router = useRouter();
19
20 useEffect(() => {
21 if (user?.isLoggedIn) {
22 router.push("/");
23 }
24 }, []);
25
26 const handleSignup = async (e: any) => {
27 setIsLoading(true);
28 e.preventDefault();
29 try {
30 const privKey = secp.utils.randomPrivateKey();
31 const privKeyHex = secp.etc.bytesToHex(privKey);
32
33 const data = {
34 pk: privKeyHex,
35 };
36
37 const response1 = await fetch("/api/get-signer/", {
38 method: "POST",
39 headers: {
40 "Content-Type": "application/json",
41 },
42 body: JSON.stringify(data),
43 });
44
45 const responseData = await response1.json();
46 const ownerAddress = responseData.data; // access the signer object
47
48 const userScwAddress: string = (await publicClient.readContract({
49 address: "0x9406Cc6185a346906296840746125a0E44976454", // simple factory addr
50 abi: simpleFactoryAbi,
51 functionName: "getAddress",
52 args: [ownerAddress, 0],
53 })) as string;
54
55 const response2 = await userbase.signUp({
56 username,
57 password,
58 rememberMe: "local",
59 profile: {
60 scwAddress: userScwAddress,
61 pk: privKeyHex,
62 },
63 });
64
65 const userInfo = {
66 username: username,
67 isLoggedIn: true,
68 userId: response2.userId,
69 scwAddress: userScwAddress,
70 };
71
72 login(userInfo);
73 router.push("/?signup=success");
74 } catch (error: any) {
75 setIsLoading(false);
76 setError(error.message);
77 console.error(error);
78 }
79 };
80
81 return (
82 <div>
83 {isLoading ? (
84 <Loader />
85 ) : (
86 <div className="flex items-center justify-center h-screen bg-gray-100">
87 <div className="w-full max-w-sm">
88 <form
89 className="bg-white rounded px-8 pt-6 pb-8 mb-24 font-mono"
90 onSubmit={handleSignup}
91 >
92 <label
93 className="block text-center text-gray-700 font-bold mb-2 text-xl"
94 htmlFor="username"
95 >
96 Sign Up 👋
97 </label>
98 <div className="divider"></div>
99 <div className="mb-4 text-xl">
100 <label
101 className="block text-gray-700 font-bold mb-2"
102 htmlFor="username"
103 >
104 Username
105 </label>
106 <input
107 className="bg-white shadow appearance-none border rounded w-full py-2 px-3 text-gray-700 leading-tight focus:outline-none focus:shadow-outline"
108 onChange={(e) => setUsername(e.target.value)}
109 id="username"
110 type="text"
111 placeholder="Username"
112 />
113 </div>
114 <div className="mb-6 text-xl">
115 <label
116 className="block text-gray-700 font-bold mb-2"
117 htmlFor="password"
118 >
119 Password
120 </label>
121 <input
122 className="bg-white shadow appearance-none border rounded w-full py-2 px-3 text-gray-700 leading-tight focus:outline-none focus:shadow-outline"
123 id="password"
124 type="password"
125 placeholder="Password"
126 onChange={(e) => setPassword(e.target.value)}
127 />
128 </div>
129 {error && <p className="text-red-500 mb-4">{error}</p>}{" "}
130 <div className="flex items-center justify-end">
131 <button className="btn text-white">Sign Up</button>
132 </div>
133 </form>
134 </div>
135 </div>
136 )}
137 </div>
138 );
139
140}

There is quite a bit going on in this file. Particularly, there are a lot of things we are importing (the next step is setting all of these imports up!). Let’s break this file down a bit by looking at some of the imports we haven’t seen yet:

Sign Up Imports

  • import * as secp from "@noble/secp256k1";

When signing up, we use the @noble/secp256k1 crypto library to generate a private key for the user.

What? A private key? Since this is a simple implementation of account abstraction, we will use the Simple Account model which makes use of a private key to generate and own a smart contract wallet.

  • import { useAuth } from "@common/auth/AuthProvider";

Our good ole’ authentication hook which will give us access to the user’s state across our app.

  • import Loader from "@common/utils/Loader";

This is a simple Loader component that we will use from DaisyUI. The loader will display any time there is an API query being performed. This just makes for better UX.

  • import { publicClient } from "@common/utils/client";
  • import simpleFactoryAbi from "@common/utils/SimpleAccountFactory.json";

The important utility here is the SimpleAccountFactory.json import. We import the abi of the SimpleAccountFactory smart contract We will make use of one of the read functions in order to deterministically generate a user’s smart contract wallet address.

  • import { useRouter } from "next/navigation";

Thanks to native next/navigation package, we can make use of the useRouter hook to handle routing across our application.

handleSignup() Function

The handleSignup function does quite a bit too, let’s break it down:

  • First, it generates a private key using @noble/secp256k1
  • Then it uses that private key to make a call to the server-side of the application (specifically to the /api/get-signer endpoint, which we have yet to set up)
  • The get-signer endpoint uses the private key to create a Signer object paired with the SimpleSmartAccountOwner imported from Alchemy’s AA SDK. The endpoint simply returns the address of the signer that will own the smart contract wallet.
  • We then do some viem magic to interface with the SimpleAccountFactory smart contract (using the imported abi) in order to deterministically read the user’s smart contract wallet address, called userScwAddress.

NOTE: We don’t the smart contract account just yet! We are just using the getAddress function of the SimpleAccountFactory contract

  • After acquiring the user’s smart contract wallet address, we have all of the info we want to create an account and store it in Userbase. The userbase.signUp API request sends the user’s private key and smart contract wallet address - this creates a new user record on userbase with this data mapped to the user account.

NOTE: We choose to store the private key in plaintext on the Userbase server, a practice that should NEVER move outside the bounds of testing. You would need to set up more authentication servers to store the key more securely. For our purposes, this works.

  • response2 is an response object we receive back from Userbase. All that’s left to do is use it to extract the user’s userId. Then we create an object of all the user data we have up to this point:
javascript
1const userInfo = {
2 username: username,
3 isLoggedIn: true,
4 userId: response2.userId,
5 scwAddress: userScwAddress,
6};
7login(userInfo);
8router.push("/?signup=success");
  • login is a function we import from our AuthProvider - all that passing in the userInfo object to it does is make all that user data available all across our app - we will need it!

  • router.push(/?signup=success) simply routes the dapp to the / route (which is whatever is in app/page.tsx)

Log In

Now that we’ve set up a route to sign up, let’s also set one up to allow our users to log in to the app! 🤝

  1. Similar to the sign up step above, create a new folder in the /app folder called /login and then in that folder create a file called page.tsx

  2. In the /login/page.tsx file, copy-paste the following code:

typescript
1"use client";
2import { useAuth } from "@common/AuthProvider";
3import Loader from "@common/utils/Loader";
4import { useRouter } from "next/navigation";
5import { useEffect, useState } from "react";
6import userbase from "userbase-js";
7import "../globals.css";
8
9export default function LoginForm() {
10const { user, login } = useAuth();
11const [username, setUsername] = useState("");
12const [password, setPassword] = useState("");
13const [error, setError] = useState<string | null>(null);
14const router = useRouter();
15const [isLoading, setIsLoading] = useState(false);
16
17 useEffect(() => {
18 if (user?.isLoggedIn) {
19 router.push("/");
20 }
21 }, []);
22
23 const handleLogin = async (e: any) => {
24 setIsLoading(true);
25 e.preventDefault();
26 try {
27 const response = await userbase.signIn({
28 username,
29 password,
30 rememberMe: "local",
31 });
32 const userInfo = {
33 username: username,
34 isLoggedIn: true,
35 userId: response.userId,
36 userScwAddress: response.profile?.scwAddress,
37 };
38 login(userInfo);
39 router.push("/?login=success");
40 console.log(`Userbase login succesful. ✅ Welcome, ${username}!`);
41 } catch (error: any) {
42 setIsLoading(false);
43 setError(error.message); // Update the error state
44 console.error(error);
45 }
46 };
47
48 return (
49 <div>
50 {isLoading ? (
51 <Loader />
52 ) : (
53 <div className="flex items-center justify-center h-screen bg-gray-100">
54 <div className="w-full max-w-sm">
55 <form
56 className="bg-white rounded px-8 pt-6 pb-8 mb-24 font-mono"
57 onSubmit={handleLogin}
58 >
59 <label
60 className="block text-center text-gray-700 font-bold mb-2 text-xl"
61 htmlFor="username"
62 >
63 Login 🧙‍♂️
64 </label>
65 <div className="divider"></div>
66 <div className="mb-4 text-xl ">
67 <label
68 className="block text-gray-700 mb-2 font-bold"
69 htmlFor="username"
70 >
71 Username
72 </label>
73 <input
74 className="bg-white shadow appearance-none border rounded w-full py-2 px-3 text-gray-700 leading-tight focus:outline-none focus:shadow-outline"
75 onChange={(e) => setUsername(e.target.value)}
76 id="username"
77 type="text"
78 placeholder="Username"
79 value={username}
80 />
81 </div>
82 <div className="mb-6 text-xl ">
83 <label
84 className="block text-gray-700 font-bold mb-2"
85 htmlFor="password"
86 >
87 Password
88 </label>
89 <input
90 className="bg-white shadow appearance-none border rounded w-full py-2 px-3 text-gray-700 leading-tight focus:outline-none focus:shadow-outline"
91 id="password"
92 type="password"
93 placeholder="Password"
94 onChange={(e) => setPassword(e.target.value)}
95 value={password}
96 />
97 </div>
98 {error && <p className="text-red-500 mb-4">{error}</p>}{" "}
99 <div className="flex items-center justify-between">
100 <div
101 className="link link-secondary cursor-pointer"
102 onClick={() => router.push("/sign-up")}
103 >
104 No account yet?
105 </div>
106 <button onClick={handleLogin} className="btn text-white">
107 Login
108 </button>
109 </div>
110 </form>
111 </div>
112 </div>
113 )}
114 </div>
115 );
116
117}

This is a much simpler component than the sign up one we put together above. Let’s break anything we haven’t seen yet down:

handleLogin() Function

  • This component sets up a simple input form. When the user submits it with a username and password, the handleLogin function uses userbase.signIn to send the data to Userbase to authenticate.
  • We then put all that data into an object and use the login function, imported using the useAuth hook, in order to make all the logged in user’s data available to our app throughout the user session. ✅

Noice! By this point, you have two super important routes set up but you should be seeing this in your project directory:

error

We don’t like all that red! That’s because we are using imports that we haven’t yet initialized. ⬇️

Step 4: Add All The Necessary utils & .env Variables

Utils

Phew, authentication can get heavy huh! We’re almost there! Let’s add some of the needed imports we used in Step 3 into our project.

  1. In the /common folder, create a new folder called /utils
  2. In the newly-created /utils folder, create a new file called SimpleAccountFactory.json and copy-paste the following:
json
1[
2 {
3 "inputs": [
4 {
5 "internalType": "contract IEntryPoint",
6 "name": "_entryPoint",
7 "type": "address"
8 }
9 ],
10 "stateMutability": "nonpayable",
11 "type": "constructor"
12 },
13 {
14 "inputs": [],
15 "name": "accountImplementation",
16 "outputs": [
17 {
18 "internalType": "contract SimpleAccount",
19 "name": "",
20 "type": "address"
21 }
22 ],
23 "stateMutability": "view",
24 "type": "function"
25 },
26 {
27 "inputs": [
28 {
29 "internalType": "address",
30 "name": "owner",
31 "type": "address"
32 },
33 {
34 "internalType": "uint256",
35 "name": "salt",
36 "type": "uint256"
37 }
38 ],
39 "name": "createAccount",
40 "outputs": [
41 {
42 "internalType": "contract SimpleAccount",
43 "name": "ret",
44 "type": "address"
45 }
46 ],
47 "stateMutability": "nonpayable",
48 "type": "function"
49 },
50 {
51 "inputs": [
52 {
53 "internalType": "address",
54 "name": "owner",
55 "type": "address"
56 },
57 {
58 "internalType": "uint256",
59 "name": "salt",
60 "type": "uint256"
61 }
62 ],
63 "name": "getAddress",
64 "outputs": [
65 {
66 "internalType": "address",
67 "name": "",
68 "type": "address"
69 }
70 ],
71 "stateMutability": "view",
72 "type": "function"
73 }
74]
  1. Still in the /utils folder, create a new file called client.ts and copy-paste the following:
javascript
1import { createPublicClient, http } from "viem";
2import { sepolia } from "viem/chains";
3
4export const publicClient = createPublicClient({
5chain: sepolia,
6transport: http(),
7});
  1. Still in the /utils folder, create a new file called Loader.tsx and copy-paste the following:
tsx
1const Loader: React.FC = () => {
2 return (
3 <div className="flex justify-center items-center min-h-screen">
4 <span className="loading loading-spinner loading-lg text-[#0a0ad0]"></span>
5 </div>
6 );
7};
8
9export default Loader;

Now, one more contract abi to add: that of the actual NFT contract!

  1. In the /utils folder, create a new file called NFTContract.json and copy-paste this JSON:
json
1[
2 {
3 "inputs": [],
4 "stateMutability": "nonpayable",
5 "type": "constructor"
6 },
7 {
8 "anonymous": false,
9 "inputs": [
10 {
11 "indexed": true,
12 "internalType": "address",
13 "name": "owner",
14 "type": "address"
15 },
16 {
17 "indexed": true,
18 "internalType": "address",
19 "name": "approved",
20 "type": "address"
21 },
22 {
23 "indexed": true,
24 "internalType": "uint256",
25 "name": "tokenId",
26 "type": "uint256"
27 }
28 ],
29 "name": "Approval",
30 "type": "event"
31 },
32 {
33 "anonymous": false,
34 "inputs": [
35 {
36 "indexed": true,
37 "internalType": "address",
38 "name": "owner",
39 "type": "address"
40 },
41 {
42 "indexed": true,
43 "internalType": "address",
44 "name": "operator",
45 "type": "address"
46 },
47 {
48 "indexed": false,
49 "internalType": "bool",
50 "name": "approved",
51 "type": "bool"
52 }
53 ],
54 "name": "ApprovalForAll",
55 "type": "event"
56 },
57 {
58 "inputs": [
59 {
60 "internalType": "address",
61 "name": "to",
62 "type": "address"
63 },
64 {
65 "internalType": "uint256",
66 "name": "tokenId",
67 "type": "uint256"
68 }
69 ],
70 "name": "approve",
71 "outputs": [],
72 "stateMutability": "nonpayable",
73 "type": "function"
74 },
75 {
76 "inputs": [
77 {
78 "internalType": "address",
79 "name": "recipient",
80 "type": "address"
81 }
82 ],
83 "name": "mint",
84 "outputs": [],
85 "stateMutability": "nonpayable",
86 "type": "function"
87 },
88 {
89 "anonymous": false,
90 "inputs": [
91 {
92 "indexed": true,
93 "internalType": "address",
94 "name": "previousOwner",
95 "type": "address"
96 },
97 {
98 "indexed": true,
99 "internalType": "address",
100 "name": "newOwner",
101 "type": "address"
102 }
103 ],
104 "name": "OwnershipTransferred",
105 "type": "event"
106 },
107 {
108 "inputs": [],
109 "name": "renounceOwnership",
110 "outputs": [],
111 "stateMutability": "nonpayable",
112 "type": "function"
113 },
114 {
115 "inputs": [
116 {
117 "internalType": "address",
118 "name": "from",
119 "type": "address"
120 },
121 {
122 "internalType": "address",
123 "name": "to",
124 "type": "address"
125 },
126 {
127 "internalType": "uint256",
128 "name": "tokenId",
129 "type": "uint256"
130 }
131 ],
132 "name": "safeTransferFrom",
133 "outputs": [],
134 "stateMutability": "nonpayable",
135 "type": "function"
136 },
137 {
138 "inputs": [
139 {
140 "internalType": "address",
141 "name": "from",
142 "type": "address"
143 },
144 {
145 "internalType": "address",
146 "name": "to",
147 "type": "address"
148 },
149 {
150 "internalType": "uint256",
151 "name": "tokenId",
152 "type": "uint256"
153 },
154 {
155 "internalType": "bytes",
156 "name": "data",
157 "type": "bytes"
158 }
159 ],
160 "name": "safeTransferFrom",
161 "outputs": [],
162 "stateMutability": "nonpayable",
163 "type": "function"
164 },
165 {
166 "inputs": [
167 {
168 "internalType": "address",
169 "name": "operator",
170 "type": "address"
171 },
172 {
173 "internalType": "bool",
174 "name": "approved",
175 "type": "bool"
176 }
177 ],
178 "name": "setApprovalForAll",
179 "outputs": [],
180 "stateMutability": "nonpayable",
181 "type": "function"
182 },
183 {
184 "inputs": [
185 {
186 "internalType": "string",
187 "name": "newBaseTokenURI",
188 "type": "string"
189 }
190 ],
191 "name": "setBaseTokenURI",
192 "outputs": [],
193 "stateMutability": "nonpayable",
194 "type": "function"
195 },
196 {
197 "anonymous": false,
198 "inputs": [
199 {
200 "indexed": true,
201 "internalType": "address",
202 "name": "from",
203 "type": "address"
204 },
205 {
206 "indexed": true,
207 "internalType": "address",
208 "name": "to",
209 "type": "address"
210 },
211 {
212 "indexed": true,
213 "internalType": "uint256",
214 "name": "tokenId",
215 "type": "uint256"
216 }
217 ],
218 "name": "Transfer",
219 "type": "event"
220 },
221 {
222 "inputs": [
223 {
224 "internalType": "address",
225 "name": "from",
226 "type": "address"
227 },
228 {
229 "internalType": "address",
230 "name": "to",
231 "type": "address"
232 },
233 {
234 "internalType": "uint256",
235 "name": "tokenId",
236 "type": "uint256"
237 }
238 ],
239 "name": "transferFrom",
240 "outputs": [],
241 "stateMutability": "nonpayable",
242 "type": "function"
243 },
244 {
245 "inputs": [
246 {
247 "internalType": "address",
248 "name": "newOwner",
249 "type": "address"
250 }
251 ],
252 "name": "transferOwnership",
253 "outputs": [],
254 "stateMutability": "nonpayable",
255 "type": "function"
256 },
257 {
258 "inputs": [
259 {
260 "internalType": "address",
261 "name": "owner",
262 "type": "address"
263 }
264 ],
265 "name": "balanceOf",
266 "outputs": [
267 {
268 "internalType": "uint256",
269 "name": "",
270 "type": "uint256"
271 }
272 ],
273 "stateMutability": "view",
274 "type": "function"
275 },
276 {
277 "inputs": [
278 {
279 "internalType": "uint256",
280 "name": "tokenId",
281 "type": "uint256"
282 }
283 ],
284 "name": "getApproved",
285 "outputs": [
286 {
287 "internalType": "address",
288 "name": "",
289 "type": "address"
290 }
291 ],
292 "stateMutability": "view",
293 "type": "function"
294 },
295 {
296 "inputs": [
297 {
298 "internalType": "address",
299 "name": "owner",
300 "type": "address"
301 },
302 {
303 "internalType": "address",
304 "name": "operator",
305 "type": "address"
306 }
307 ],
308 "name": "isApprovedForAll",
309 "outputs": [
310 {
311 "internalType": "bool",
312 "name": "",
313 "type": "bool"
314 }
315 ],
316 "stateMutability": "view",
317 "type": "function"
318 },
319 {
320 "inputs": [],
321 "name": "MAX_SUPPLY",
322 "outputs": [
323 {
324 "internalType": "uint256",
325 "name": "",
326 "type": "uint256"
327 }
328 ],
329 "stateMutability": "view",
330 "type": "function"
331 },
332 {
333 "inputs": [],
334 "name": "name",
335 "outputs": [
336 {
337 "internalType": "string",
338 "name": "",
339 "type": "string"
340 }
341 ],
342 "stateMutability": "view",
343 "type": "function"
344 },
345 {
346 "inputs": [],
347 "name": "owner",
348 "outputs": [
349 {
350 "internalType": "address",
351 "name": "",
352 "type": "address"
353 }
354 ],
355 "stateMutability": "view",
356 "type": "function"
357 },
358 {
359 "inputs": [
360 {
361 "internalType": "uint256",
362 "name": "tokenId",
363 "type": "uint256"
364 }
365 ],
366 "name": "ownerOf",
367 "outputs": [
368 {
369 "internalType": "address",
370 "name": "",
371 "type": "address"
372 }
373 ],
374 "stateMutability": "view",
375 "type": "function"
376 },
377 {
378 "inputs": [
379 {
380 "internalType": "bytes4",
381 "name": "interfaceId",
382 "type": "bytes4"
383 }
384 ],
385 "name": "supportsInterface",
386 "outputs": [
387 {
388 "internalType": "bool",
389 "name": "",
390 "type": "bool"
391 }
392 ],
393 "stateMutability": "view",
394 "type": "function"
395 },
396 {
397 "inputs": [],
398 "name": "symbol",
399 "outputs": [
400 {
401 "internalType": "string",
402 "name": "",
403 "type": "string"
404 }
405 ],
406 "stateMutability": "view",
407 "type": "function"
408 },
409 {
410 "inputs": [
411 {
412 "internalType": "uint256",
413 "name": "index",
414 "type": "uint256"
415 }
416 ],
417 "name": "tokenByIndex",
418 "outputs": [
419 {
420 "internalType": "uint256",
421 "name": "",
422 "type": "uint256"
423 }
424 ],
425 "stateMutability": "view",
426 "type": "function"
427 },
428 {
429 "inputs": [
430 {
431 "internalType": "address",
432 "name": "owner",
433 "type": "address"
434 },
435 {
436 "internalType": "uint256",
437 "name": "index",
438 "type": "uint256"
439 }
440 ],
441 "name": "tokenOfOwnerByIndex",
442 "outputs": [
443 {
444 "internalType": "uint256",
445 "name": "",
446 "type": "uint256"
447 }
448 ],
449 "stateMutability": "view",
450 "type": "function"
451 },
452 {
453 "inputs": [
454 {
455 "internalType": "uint256",
456 "name": "tokenId",
457 "type": "uint256"
458 }
459 ],
460 "name": "tokenURI",
461 "outputs": [
462 {
463 "internalType": "string",
464 "name": "",
465 "type": "string"
466 }
467 ],
468 "stateMutability": "view",
469 "type": "function"
470 },
471 {
472 "inputs": [],
473 "name": "totalSupply",
474 "outputs": [
475 {
476 "internalType": "uint256",
477 "name": "",
478 "type": "uint256"
479 }
480 ],
481 "stateMutability": "view",
482 "type": "function"
483 }
484]

Nice, the localhost:3000/sign-up and localhost:3000/login routes should now be viewable without errors! 👀

Note, they still won’t work and you’ll get errors if you submit them! We need to set up the API requests… ⬇️ BUT before we do that, let’s set up a gas policy on Alchemy. We want to get a special API key that our app will map to our gas policy of paying for user NFT mints! 🚀

Step 6: Set Up the /api Folder + Routes

Let’s go ahead and set up all of the API requests, whether external or on the server-side of our NextJS application in this step. We will set up four endpoints to:

  1. Get the owner address for a smart contract wallet deterministically (uses the AA SDK)
  2. Get a smart contract wallet’s owned NFTs (uses the Alchemy SDK)
  3. Submit a sponsored user operation on behalf of the user’s smart contract wallet (uses the AA SDK)
  4. Get a user’s private key from the Userbase server whenever necessary

Let’s jump in! 🤿

Install More Dependencies

We need a lot of tools from Alchemy at this point:

  1. In your terminal, run npm i @alchemy/[email protected] @alchemy/[email protected] alchemy-sdk

And that’s it! 🧙‍♂️

Create API Endpoints

Get Owner of Smart Contract Wallet Deterministically

  1. In the /app folder of your project, create a new folder called /api
  2. Inside the newly-created /app folder, create a new folder called /get-signer
  3. And inside that folder, create a new file called route.ts

This is how you create API routes in NextJS 13!

  1. Inside the route.ts of the /get-signer folder, copy-paste the following code:
typescript
1import { withAlchemyGasManager } from "@alchemy/aa-alchemy";
2import {
3 LocalAccountSigner,
4 SimpleSmartContractAccount,
5 SmartAccountProvider,
6 type SimpleSmartAccountOwner,
7} from "@alchemy/aa-core";
8import { NextRequest, NextResponse } from "next/server";
9import { sepolia } from "viem/chains";
10
11const ALCHEMY_API_URL = `https://eth-sepolia.g.alchemy.com/v2/${process.env.ALCHEMY_API_KEY}`;
12
13const ENTRYPOINT_ADDRESS = process.env
14.SEPOLIA_ENTRYPOINT_ADDRESS as `0x${string}`;
15const SIMPLE_ACCOUNT_FACTORY_ADDRESS = process.env
16.SEPOLIA_SIMPLE_ACCOUNT_FACTORY_ADDRESS as `0x${string}`;
17
18export async function POST(request: NextRequest) {
19const body = await request.json();
20
21 const { pk } = body;
22
23 const owner: SimpleSmartAccountOwner =
24 LocalAccountSigner.privateKeyToAccountSigner(`0x${pk}`);
25
26 const chain = sepolia;
27 const provider = new SmartAccountProvider(
28 ALCHEMY_API_URL,
29 ENTRYPOINT_ADDRESS,
30 chain,
31 undefined,
32 {
33 txMaxRetries: 10,
34 txRetryIntervalMs: 5000,
35 }
36 );
37
38 let signer = provider.connect(
39 (rpcClient) =>
40 new SimpleSmartContractAccount({
41 entryPointAddress: ENTRYPOINT_ADDRESS,
42 chain,
43 owner,
44 factoryAddress: SIMPLE_ACCOUNT_FACTORY_ADDRESS,
45 rpcClient,
46 })
47 );
48
49 // [OPTIONAL] Use Alchemy Gas Manager
50 signer = withAlchemyGasManager(signer, {
51 policyId: process.env.SEPOLIA_PAYMASTER_POLICY_ID!,
52 entryPoint: ENTRYPOINT_ADDRESS,
53 });
54
55 const ownerAccount = signer.account;
56 const ownerAddress = (ownerAccount as any).owner.owner.address;
57
58 return NextResponse.json({ data: ownerAddress });
59
60}

All this script does is create a Signer object, similar to the ethers.js Signer class that is allowed to sign and submit user operations.

Get a Smart Contract Wallet’s NFTs

We’ll want to build a simple wallet display so that when a user gaslessly mints an NFT to their smart contract wallet, they are able to see the change of state.

  1. In the /api folder, create a new folder called /get-user-nfts and inside that folder create a file called route.ts
  2. Copy-paste the following code into route.ts:
typescript
1import { NextRequest, NextResponse } from "next/server";
2
3const { Alchemy, Network } = require("alchemy-sdk");
4
5const settings = {
6 apiKey: process.env.ALCHEMY_API_KEY,
7 network: Network.ETH_SEPOLIA,
8};
9
10const alchemy = new Alchemy(settings);
11
12export async function POST(request: NextRequest) {
13 const body = await request.json();
14
15 const { address } = body;
16 const nfts = await alchemy.nft.getNftsForOwner(address);
17
18 console.log(nfts);
19
20 return NextResponse.json({
21 data: nfts,
22 });
23}

Nice and simple script that uses the Alchemy SDK to fetch a user’s NFTs! One more endpoint…

Submit a sponsored user operation on behalf of the user’s smart contract wallet

  1. Still in the /api folder, create a new folder called /mint-nft-user-op and create a file inside that folder called route.ts
  2. Inside the route.ts file, copy-paste the following code:
Warning: This script is heavy!
typescript
1import { withAlchemyGasManager } from "@alchemy/aa-alchemy";
2import {
3 LocalAccountSigner,
4 SendUserOperationResult,
5 SimpleSmartAccountOwner,
6 SimpleSmartContractAccount,
7 SmartAccountProvider,
8} from "@alchemy/aa-core";
9import nftContractAbi from "@common/utils/SimpleAccountFactory.json";
10import axios from "axios";
11import { NextRequest, NextResponse } from "next/server";
12import { encodeFunctionData, parseEther } from "viem";
13import { sepolia } from "viem/chains";
14
15export async function POST(request: NextRequest) {
16const body = await request.json();
17
18 const { userId, userScwAddress } = body;
19 // get user's pk from server
20 const userResponse = await getUser(userId);
21 const userResponseObject = await userResponse?.json();
22 const pk = userResponseObject?.response?.profile?.pk;
23
24 const signer = await createSigner(pk);
25
26 const amountToSend: bigint = parseEther("0");
27
28 const data = encodeFunctionData({
29 abi: nftContractAbi,
30 functionName: "mint",
31 args: [userScwAddress], // User's Smart Contract Wallet Address
32 });
33
34 const result: SendUserOperationResult = await signer.sendUserOperation({
35 target: process.env.SEPOLIA_NFT_ADDRESS as `0x${string}`,
36 data: data,
37 value: amountToSend,
38 });
39
40 console.log("User operation result: ", result);
41
42 console.log(
43 "\nWaiting for the user operation to be included in a mined transaction..."
44 );
45
46 const txHash = await signer.waitForUserOperationTransaction(
47 result.hash as `0x${string}`
48 );
49
50 console.log("\nTransaction hash: ", txHash);
51
52 const userOpReceipt = await signer.getUserOperationReceipt(
53 result.hash as `0x${string}`
54 );
55
56 console.log("\nUser operation receipt: ", userOpReceipt);
57
58 const txReceipt = await signer.rpcClient.waitForTransactionReceipt({
59 hash: txHash,
60 });
61
62 return NextResponse.json({ receipt: txReceipt });
63
64}
65
66async function getUser(userId: any) {
67try {
68const response = await axios.get(
69`https://v1.userbase.com/v1/admin/users/${userId}`,
70{
71headers: {
72Authorization: `Bearer ${process.env.USERBASE_ACCESS_TOKEN}`,
73},
74}
75);
76
77 console.log(response.data); // The user data will be available here
78 return NextResponse.json({ response: response.data });
79 } catch (error) {
80 console.error("Error fetching user:", error);
81 }
82
83}
84
85async function createSigner(USER_PRIV_KEY: any) {
86const ALCHEMY_API_URL = `https://eth-sepolia.g.alchemy.com/v2/${process.env.ALCHEMY_API_KEY}`;
87const ENTRYPOINT_ADDRESS = process.env
88.SEPOLIA_ENTRYPOINT_ADDRESS as `0x${string}`;
89const SIMPLE_ACCOUNT_FACTORY_ADDRESS = process.env
90.SEPOLIA_SIMPLE_ACCOUNT_FACTORY_ADDRESS as `0x${string}`;
91const owner: SimpleSmartAccountOwner =
92LocalAccountSigner.privateKeyToAccountSigner(`0x${USER_PRIV_KEY}`);
93
94 const chain = sepolia;
95 const provider = new SmartAccountProvider(
96 ALCHEMY_API_URL,
97 ENTRYPOINT_ADDRESS,
98 chain,
99 undefined,
100 {
101 txMaxRetries: 10,
102 txRetryIntervalMs: 5000,
103 }
104 );
105
106 let signer = provider.connect(
107 (rpcClient) =>
108 new SimpleSmartContractAccount({
109 entryPointAddress: ENTRYPOINT_ADDRESS,
110 chain,
111 owner,
112 factoryAddress: SIMPLE_ACCOUNT_FACTORY_ADDRESS,
113 rpcClient,
114 })
115 );
116
117 // [OPTIONAL] Use Alchemy Gas Manager
118 signer = withAlchemyGasManager(signer, {
119 policyId: process.env.SEPOLIA_PAYMASTER_POLICY_ID!,
120 entryPoint: ENTRYPOINT_ADDRESS,
121 });
122
123 return signer;
124
125}

Get a User’s pk from Userbase

  1. Run npm i axios as this will be an external API call
  2. In the /api folder, create a new folder called /get-user and, same as all above, create a file inside it called route.ts
  3. In the route.ts file, copy-paste the following quick script:
typescript
1import axios from "axios";
2import { NextRequest, NextResponse } from "next/server";
3
4export async function POST(request: NextRequest) {
5 const body = await request.json();
6
7 const { userId } = body;
8
9 try {
10 const response = await axios.get(
11 `https://v1.userbase.com/v1/admin/users/${userId}`,
12 {
13 headers: {
14 Authorization: `Bearer ${process.env.USERBASE_ACCESS_TOKEN}`,
15 },
16 }
17 );
18
19 console.log(response.data); // The user data will be available here
20 return NextResponse.json({ response: response.data });
21 } catch (error) {
22 console.error("Error fetching user:", error);
23 }
24}

All in all, your /api folder, after this step, should look like this:

api-folder

You’ve just set up super powerful API routes in your NextJS 13 project! 💫 You’ll notice we used a whole bunch of environment variables to make the scripts work - let’s add the remaining values! ⬇️

Final Remaining .env File Variables To Add

  1. In your project’s .env.local file, set up these slate of variables - needed to make your API scripts work:
env SEPOLIA_ENTRYPOINT_ADDRESS=
1SEPOLIA_SIMPLE_ACCOUNT_FACTORY_ADDRESS=
2SEPOLIA_NFT_ADDRESS=0x5700D74F864CE224fC5D39a715A744f8d1964429

By now, your .env.local file should look something like this:

env

We’re almost there!! 🏃‍♂️

Psst! You should be able to successfully sign up as a user now! The app will break since it won’t know where to re-direct state successfully, but feel free to try signing up for an account, then go to Userbase.com and select your Starter App - by this point, you should see the user you just created successfully on the Userbase end!

Step 7: Set Up Your / (Home!) Route

It must be annoying to not be able to load localhost:3000/ without any errors or it still displaying old instructions, so let’s fix that! 🛠️

We want our home component to do two things:

  1. If the user is not logged in, re-direct to /login
  2. If the user is logged in, display a page where they can toggle either their wallet view (ie, a display to show the currently owned NFTs of the user’s smart contract wallet) and a minter view (ie, a display to mint a new NFT to their smart contract wallet)

Let’s do it! 🚴‍♀️

Setting up the Home Route

  1. First of alll, let’s take a quick detour - add background-color: white; to the body tag inside the globals.css file - let’s make our app light mode enabled for now! (Remember to save the file!)
  2. Second, we’re going to use the Random Avatar Generator package to give each of our users a cool avatar! Run npm i random-avatar-generator in your project terminal
  3. Now, go to /app/page.tsx (this is your app’s default component; whenever a user visits the / route, this component will render!)
  4. Copy-paste the following code:
typescript
1"use client";
2import GaslessMinter from "@common/GaslessMinter";
3import WalletDisplay from "@common/WalletDisplay";
4import "./globals.css";
5
6import { useAuth } from "@common/AuthProvider";
7import { useRouter } from "next/navigation";
8import { AvatarGenerator } from "random-avatar-generator";
9import { useState } from "react";
10import userbase from "userbase-js";
11
12export default function Home() {
13const { user, logout } = useAuth();
14const router = useRouter();
15const [walletViewActive, setWalletViewActive] = useState(true);
16const generator = new AvatarGenerator();
17
18 function handleLogout() {
19 try {
20 userbase
21 .signOut()
22 .then(() => {
23 // user logged out
24 console.log("User logged out!");
25 logout();
26 router.push("/");
27 })
28 .catch((e: any) => console.error(e));
29 } catch (error: any) {
30 console.log(error);
31 }
32 }
33
34 return (
35 <div>
36 {user?.isLoggedIn ? (
37 <div className="font-mono text-2xl mt-8">
38 <div className="flex items-center justify-center">
39 <div className="avatar">
40 <div className="rounded-full ml-12">
41 <img src={generator.generateRandomAvatar(user?.userId)} />
42 </div>
43 </div>
44 <div className="flex flex-col ml-6 gap-2">
45 <div className="text-black">
46 <b>User:</b> {user?.username}
47 </div>
48 <div className="text-black">
49 <b>SCW :</b>{" "}
50 <a
51 className="link link-secondary"
52 href={`https://sepolia.etherscan.io/address/${user?.scwAddress}`}
53 target="_blank"
54 >
55 {user?.scwAddress}
56 </a>
57 </div>
58 <div className="text-black">
59 {user?.isLoggedIn ? (
60 <div className="btn btn-outline" onClick={handleLogout}>
61 <a>Log out</a>
62 </div>
63 ) : (
64 ""
65 )}
66 </div>
67 </div>
68 </div>
69 <div className="tabs items-center flex justify-center mb-[-25px]">
70 <a
71 className={`tab tab-lg tab-lifted text-2xl ${
72 walletViewActive ? "tab-active text-white" : ""
73 }`}
74 onClick={() => setWalletViewActive(!walletViewActive)}
75 >
76 Your Wallet
77 </a>
78 <a
79 className={`tab tab-lg tab-lifted text-2xl ${
80 walletViewActive ? "" : "tab-active text-white"
81 }`}
82 onClick={() => setWalletViewActive(!walletViewActive)}
83 >
84 Mint an NFT
85 </a>
86 </div>
87 <div className="divider mx-16 mb-8"></div>
88 {walletViewActive ? <WalletDisplay /> : <GaslessMinter />}
89 </div>
90 ) : (
91 <div>
92 <div className="text-black flex flex-col items-center justify-center mt-36 mx-8 text-4xl font-mono">
93 Please log in to continue! 👀
94 <button
95 onClick={() => router.push("/login")}
96 className="btn mt-6 text-white"
97 >
98 Login
99 </button>
100 </div>
101 </div>
102 )}
103 </div>
104 );
105
106}

By now, your app / route should look like this:

home

We are setting up the Home component so that whenever a user loads the / route, the app runs a quick hook to check whether they are logged in. If they are, display the Wallet + Minter components (the toggle between those two components relies on the walletViewActive state variable), else display a simple Please log in to continue! text.

Step 8: Set Up Wallet Display + Gasless Minter Components

You’ll notice at this point, your code editor should be complaining that we are trying to use two components that we haven’t created yet: WalletDisplay and GaslessMinter. Let’s create each of these now…

WalletDisplay

  1. In your /common folder, create a new component called WalletDisplay.tsx
  2. Open the WalletDisplay.tsx file and copy-paste the following:
tsx
1import { useAuth } from "@common/AuthProvider";
2import Loader from "@common/utils/Loader";
3import { useEffect, useState } from "react";
4
5interface Nft {
6 contract: object;
7 tokenId: string;
8 tokenType: string;
9 title: string;
10 description: string;
11 media: object;
12}
13
14interface Data {
15 ownedNfts: Nft[];
16 length: number;
17}
18
19export default function WalletDisplay() {
20 const { user } = useAuth();
21 const [ownedNftsArray, setOwnedNftsArray] = useState<Data | null>(null);
22 const [isLoading, setIsLoading] = useState(true);
23
24 useEffect(() => {
25 fetchUserNfts();
26 }, []);
27
28 function truncateDescription(description: string, wordCount: number) {
29 const words = description.split(" ");
30 if (words.length > wordCount) {
31 const truncatedWords = words.slice(0, wordCount);
32 return `${truncatedWords.join(" ")} ...`;
33 }
34 return description;
35 }
36
37 async function fetchUserNfts() {
38 setIsLoading(true);
39 try {
40 const data = { address: user?.scwAddress };
41 const response = await fetch("/api/get-user-nfts/", {
42 method: "POST",
43 headers: { "Content-Type": "application/json" },
44 body: JSON.stringify(data),
45 });
46 const messageResponse = await response.json();
47 console.log(messageResponse.data.ownedNfts);
48 setOwnedNftsArray(messageResponse.data.ownedNfts);
49 setIsLoading(false);
50 } catch (error) {
51 console.error("Error fetching NFTs:", error);
52 }
53 }
54
55 return (
56 <div>
57 {isLoading ? (
58 <div className="flex items-center justify-center mt-[-350px]">
59 <Loader />
60 </div>
61 ) : ownedNftsArray && ownedNftsArray.length >= 1 ? (
62 <div className="flex flex-col items-cente">
63 <div className="grid grid-cols-1 sm:grid-cols-2 md:grid-cols-3 lg:grid-cols-4 gap-4 mx-12 mb-6">
64 {ownedNftsArray &&
65 Array.isArray(ownedNftsArray) &&
66 ownedNftsArray.map((nft, index) => (
67 <div
68 key={index}
69 className="rounded-lg shadow-xl max-w-[250px] max-h-[600px] overflow-hidden"
70 >
71 <figure>
72 <img
73 src={
74 nft.tokenUri.gateway
75 ? nft.tokenUri.gateway
76 : nft.tokenUri.raw
77 }
78 alt="user nft image"
79 className="w-full max-h-[300px]"
80 />
81 </figure>
82 <div className="p-4">
83 <h2 className="text-xl font-semibold mb-2">{nft.title}</h2>
84 <p className="">
85 {truncateDescription(nft.description, 25)}
86 </p>
87 </div>
88 </div>
89 ))}
90 </div>
91 </div>
92 ) : (
93 <div>
94 <div className="flex flex-col items-center justify-center mx-8 mt-32 text-black">
95 Your smart contract wallet does not own any NFTs yet! 🤯
96 <div className="flex mt-4">
97 Mint one by selecting the <b>&nbsp;Mint an NFT&nbsp;</b> tab. ⬆️
98 </div>
99 </div>
100 </div>
101 )}
102 </div>
103 );
104}

This component will, on-mount, immediately make a call to the get-user-nfts endpoint we set up in Step #6, passing the user’s smart contract wallet address as an argument. So, every time the page loads, a new query to check the user’s smart contract wallet owned NFTs is performed.

GaslessMinter

  1. There’s a really awesome npm package called react-confetti that we’ll use to celebrate whenever one of your application’s users gaslessly mints an NFT, install it by running npm i react-confetti

  2. In your /common folder, create a new component file called GaslessMinter.tsx and copy-paste the following:

javascript
1import { useAuth } from "@common/AuthProvider";
2import { useState } from "react";
3import Confetti from "react-confetti";
4
5export default function GaslessMinter() {
6const { user } = useAuth();
7const [isLoading, setIsLoading] = useState(false);
8const [hasMinted, setHasMinted] = useState(false);
9
10 async function handleMint() {
11 setIsLoading(true);
12 const data = {
13 userId: user?.userId,
14 userScwAddress: user?.scwAddress,
15 nameOfFunction: "mint",
16 };
17
18 await fetch("/api/mint-nft-user-op/", {
19 method: "POST",
20 headers: {
21 "Content-Type": "application/json",
22 },
23 body: JSON.stringify(data),
24 });
25 setTimeout(() => {}, 10000); // 10 seconds
26 setIsLoading(false);
27 setHasMinted(true);
28 }
29 return (
30 <div className="flex items-center justify-center mt-12">
31 {hasMinted ? <Confetti /> : ""}
32 <div className="card lg:card-side shadow-xl w-[70%] mb-16">
33 <figure>
34 <img
35 src="https://github-production-user-asset-6210df.s3.amazonaws.com/83442423/267730896-dd9791c9-00b9-47ff-816d-0d626177909c.png"
36 alt="sample nft"
37 />
38 </figure>
39
40 <div className="card-body text-black">
41 <h2 className="card-title text-2xl">
42 Generic Pudgy Penguin on Sepolia
43 </h2>
44 <p className="text-sm">
45 You are about to mint a fake NFT purely for testing purposes. The
46 NFT will be minted directly to your smart contract wallet!
47 </p>
48 <div className="flex items-center justify-end">
49 <div
50 className={`alert w-[75%] mr-4 ${
51 hasMinted ? "visible" : "hidden"
52 }`}
53 >
54 <svg
55 xmlns="http://www.w3.org/2000/svg"
56 className="stroke-current shrink-0 h-6 w-6"
57 fill="none"
58 viewBox="0 0 24 24"
59 >
60 <path
61 strokeLinecap="round"
62 strokeLinejoin="round"
63 strokeWidth="2"
64 d="M9 12l2 2 4-4m6 2a9 9 0 11-18 0 9 9 0 0118 0z"
65 />
66 </svg>
67 <div className="flex justify-end text-right">
68 <span className="text-white">NFT minted. ✅</span>
69 </div>
70 </div>
71 <button className="btn btn-primary text-white" onClick={handleMint}>
72 <span
73 className={`${
74 isLoading ? "loading loading-spinner" : "hidden"
75 }`}
76 ></span>
77 {isLoading ? "Minting" : hasMinted ? "Mint Again" : "Mint"}
78 </button>
79 </div>
80 </div>
81 </div>
82 </div>
83 );
84}

Step 9: Mint Your NFT!

Woah, you just set up a full-stack end-to-end account abstraction solution for gaslessly minting NFTs - fantastic job! 💥

Here are some ther optimizations and features you can work on if you want an extra challenge at this point:

  • can you make the NFT burnable and/or transferrable?
  • can you make the UX even better?
  • can you deploy this to a production server and share with your friends?

Here is the Github repo containing all of the code in this tutorial, please feel free to fork and make it your own!