
How to write Solana programs in Python using Seahorse
Written by Adesoye Jeremiah Olayinka
Solana is a high-performance blockchain network with smart contract functionality built to scale for global adoption. Solana processes an average of 3,000 transactions per second, and is one of the fastest blockchain protocols. Solana Programs are smart contracts written on the Solana blockchain network used to perform every activity, including token transfers, minting NFTs, and voting on-chain.
This article will explain how to write Solana Programs in Python using the Seahorse development framework from a local development environment and from an online IDE.
What are the main ways to develop programs on Solana?
To develop Solana Programs, you need to learn Rust, build with the Anchor development framework, or use Seahorse, a pythonic development framework for Solana.
Rust is the programming language on which Solana was built, and it is the default web3 programming language that can be used to interact with Solana's Sealevel Runtime.
Developing on Solana with anchor
Anchor is a framework used to make Solana application development easier by abstracting the complexities of the Rust language from the average user.
Anchor provides Solana developers with tools like the Interface Definition Language (IDL), Typescript packages that generate clients from the IDL, Rust crates, and Command Line Interface (CLI).
Developing on Solana with Seahorse
Seahorse is a community-led Solana development framework that grants developers the ability to write Solana programs in the Python programming language.
Seahorse allows every program written in Python to have the same safety measures that come with Rust programs. Seahorse is fully compatible with Anchor, and is also interoperable with Rust code.
Python is used in the everyday programming of web applications and machine learning projects, and is the most popular programming language.
Since many developers interested in building blockchain-based applications might already have Python programming skills, they can use Seahorse to build a Solana application without having to learn a brand new programming language (Rust).
How to use Seahorse with a local Solana developer environment
A platform like Solana Playground is only for building and testing applications quickly and should not be depended on for creating large-scale dapps. To set up the environment needed for building with Seahorse on our local workspace, we are going to install the following:
- Rust
- The Solana Tool Suite
- Node
- Anchor
- Seahorse
1. Install the essential Solana development tools
To install Rust, the Solana Tool Suite, Node, and Anchor, refer to this tutorial on setting up a local Solana developer environment.
If you're running a Linux-based machine you may need to run the following command to add additional dependencies:
2. Install Seahorse
Seahorse depends on Anchor and the Rustfmt to work properly. Because Anchor is already be working on your machine, installing Rustfmt package and Anchor is easy.
Run the following command to add the Rustfmt package:
Run the following command in your terminal to install Seahorse:
Run one final command to check the Seahorse was properly installed:
3. Generate a paper wallet
Since you already have the Solana Command Line Tools installed, you can create a local "paper" wallet to use while working locally.
Run the following command to verify the Solana CLI tools are installed:
Then type the next command to generate a new keypair:
Save the details properly so you can start using them in your local environment.
To fund your paper wallet:
Run the solana airdrop 2 command to acquire 2 test SOL tokens
If you want to use an online developer environment to test Seahorse instead of running it locally, a good option is Solana Playground.
How to set up Seahorse with Solana playground
Solana Playground is an online Integrated Development Environment built for jumpstarting Solana application development.
Solana Playground offers the following prebuilt Crates:
- Native (Rust) - for developers who intend to build on Solana without any framework
- Anchor (Rust) - for developers to build on Solana in Rust additional tooling
- Seahorse (Python) - for Solana developers with experience programming with Python
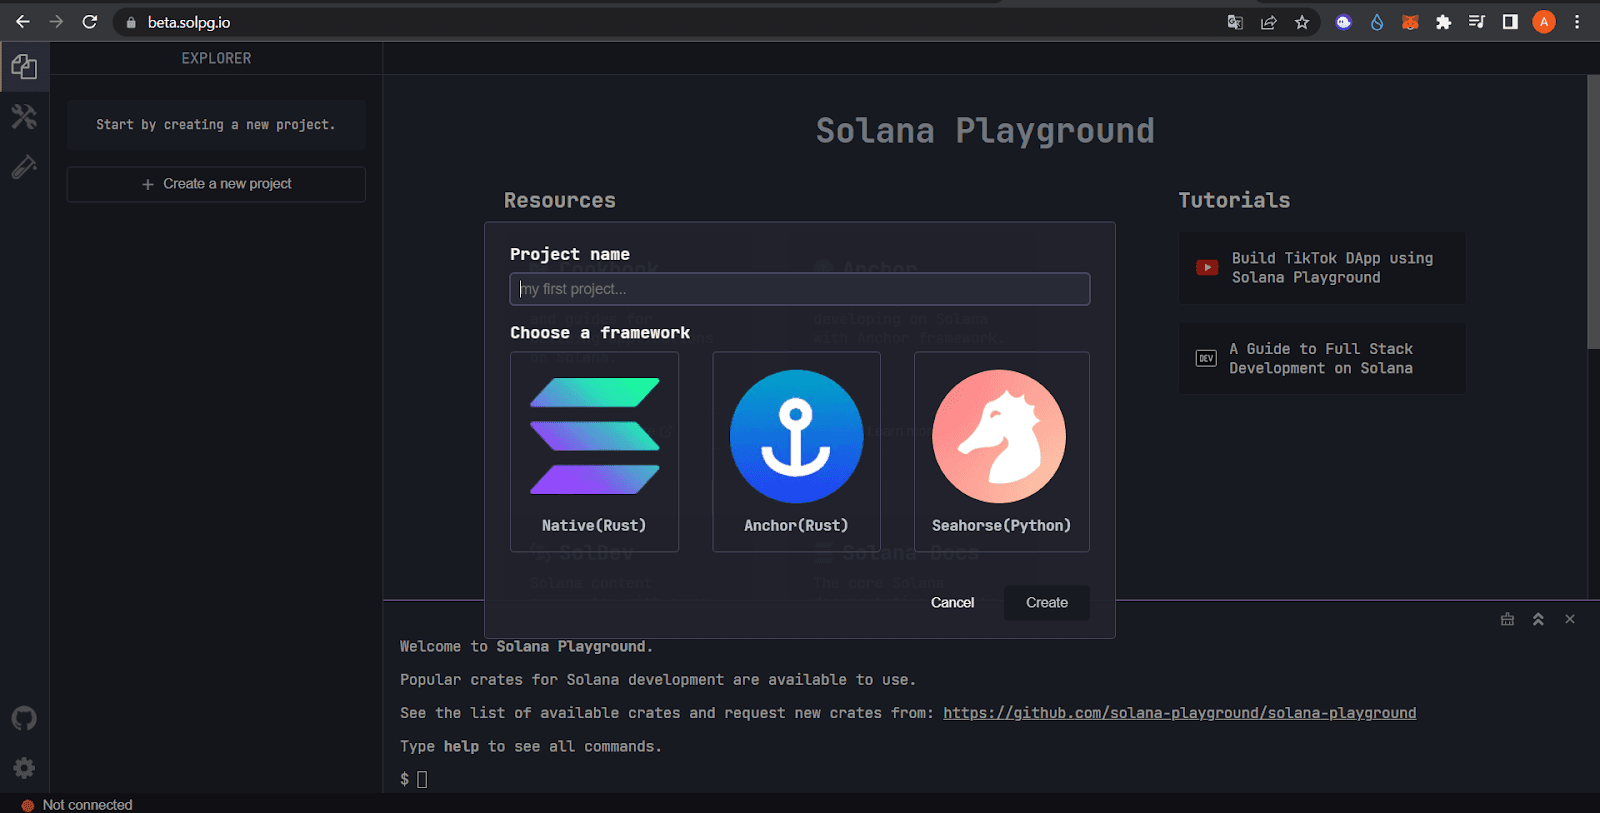
1. Create a new Solana playground project
Create a new project on Solana Playground with a name for the directory. After creating a name, a demo project named, FizzBuzz, will appear. This mini dapp is what we will use within this tutorial.
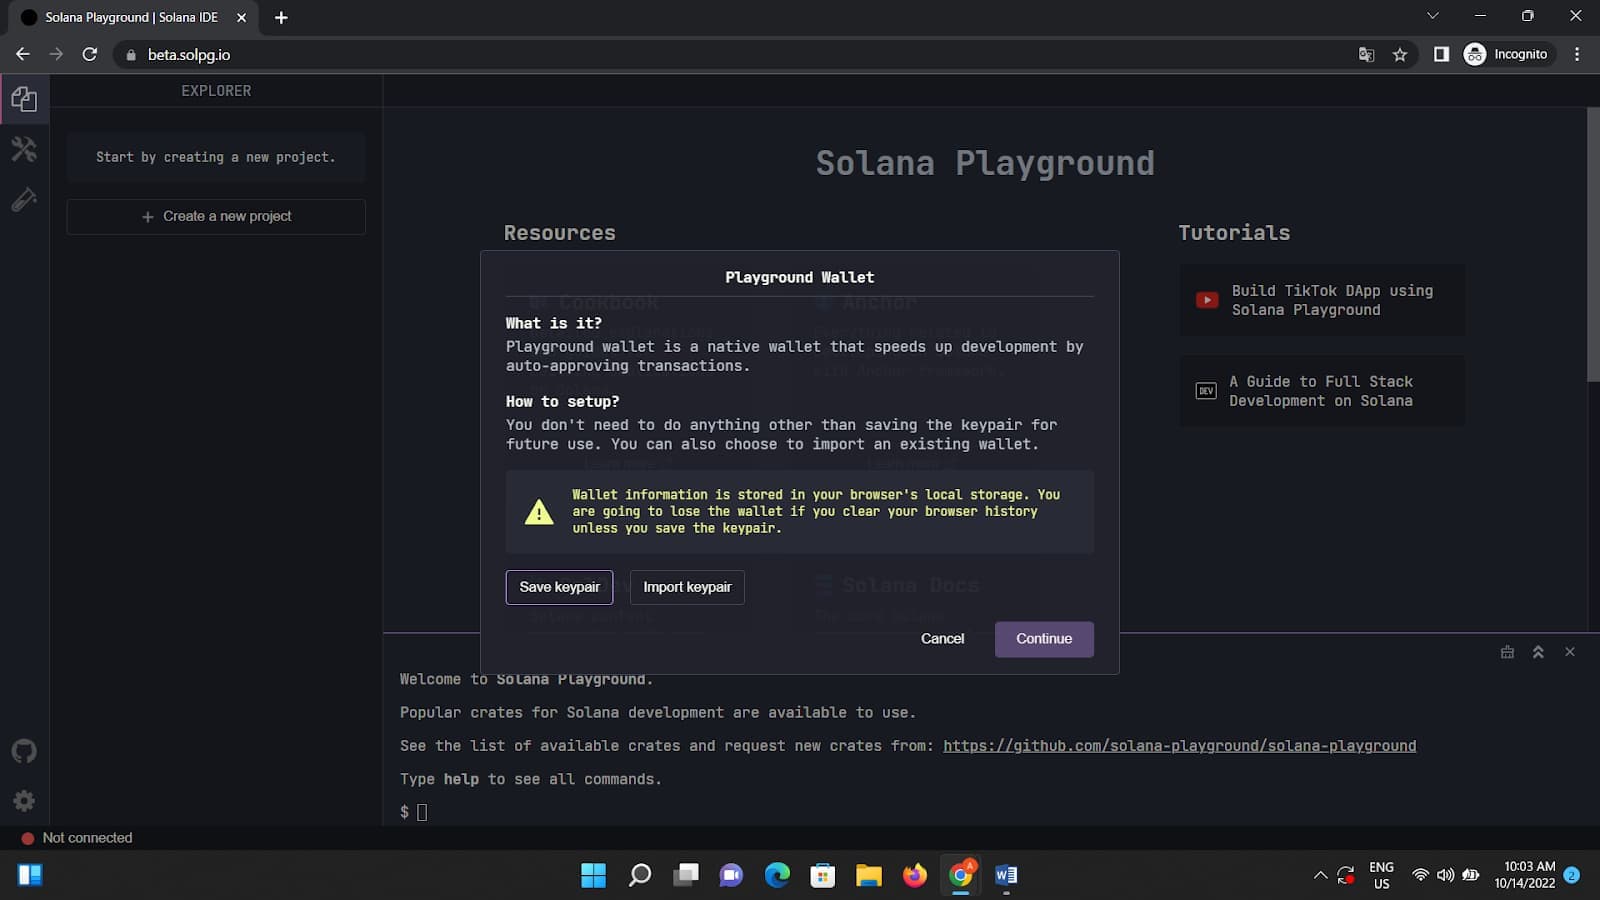
2. Create a playground wallet
You must first generate a Playground Wallet for interacting with your Seahorse programs. The Playground Wallet acts as a test wallet for the application.
- Click on the “playground wallet”
- Select a new wallet
- Follow the prompts and download the JSON file
3. Get test SOL tokens
Type the following commands in the playground terminal to get devnet SOL tokens:
$ connect
The connect command links your test wallet with the project.
$ solana address
The solana address command prints out your Solana wallet address. We will use this address later to initiate the FizzBuzz app.
$ solana airdrop 2
The solana airdrop command deposits test SOL tokens in your wallet to cover the fees required to execute transactions such as “Build” or “Deploy.”
How seahorse’s Python components work
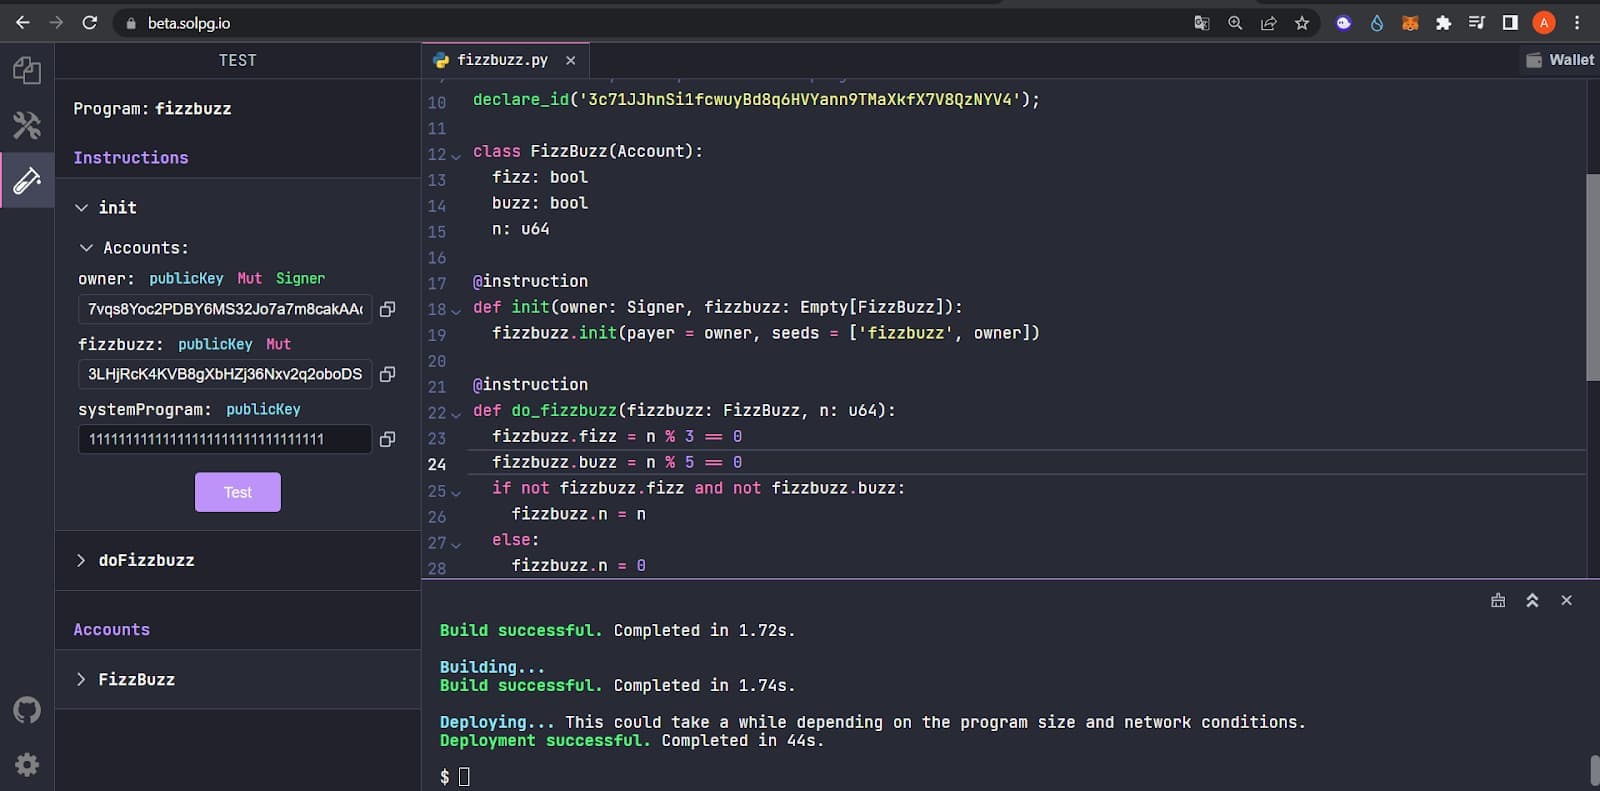
In this section, we will walk through creating the popular but simple FizzBuzz app on-chain. There are three main sections in our code:
- The Account
- Instruction 1
- Instruction 2
1. Account
Executable Accounts are used to define the executable code (smart contract) that runs on the Solana blockchain. In the Accounts definition, you can assign the data types needed in your Solana programs.
Fizz and Buzz are defined to be Boolean data types, while the “n” variable is an unsigned integer type.
2. Instruction 1
There are other forms of accounts called Built-In Accounts. Most of these built-in accounts are used in calling specific instructions on-chain.
A. Signer account
Instructions that require signers need a wallet’s approval. A Signer is the wallet that signs the transaction with the instruction call defined in this part of the code.
The owner keyword is used to hold the value of the Signer’s details. To get the public key of the Signer, you can add this code:
B. Empty account
An empty account type is used to initialize the class of the main Account (FizzBuzz) even though it is initially empty.
By using the Empty keyword, you can construct the class defined in the main Account. When the FizzBuzz account is initialized, the creation fee is paid by the Owner (i.e. the signer of the transaction).
Once that account has been created on-chain, it can not be re-created when called again by the same owner. The seed generated from the initialization is able to identify the original account.
3. Instruction 2
The second instruction call uses the already created accounts with their values.
Here is the complete code sample for FizzBuzz:
Start building Solana applications with Python using Seahorse
Seahorse is a community-led open-source project that is entirely free for public use. Seahorse is currently in beta and many of its features are still yet to be implemented. While it is not production-ready, it can be used to experiment and develop applications on Solana's devnet.
With Seahorse, building on Solana with Python is possible and simple. If you're a Python developer interested in learning web3 development, exploring Seahorse with Solana Playground is a safe and fun way to start acquiring skills using Anchor, Rust, and Solana programs.
Related Overviews


Build blockchain magic
Alchemy combines the most powerful web3 developer products and tools with resources, community and legendary support.