
Creating a Flash Loan using Aave
Written by Alchemy
Introduction
In this tutorial, we will:
Create and deploy a Flash loan smart contract
Receive funding with the liquidity protocol called Aave
Transact with our deployed contract to execute a Flash loan
Before we begin, let's look at each of the building blocks of this project:
What is a flash loan?
In traditional finance, borrowers many times are required to offer collateral to receive a loan. This collateral is usually in the form of an asset like a car or home. Banks use this collateral as security to cover losses if the borrower fails to pay.
In the world of Decentralized Finance(DeFi), a borrower can receive a loan without the need for providing collateral by using flash loans.
In a flash loan, lenders can both provide a loan to a borrower and be paid back for that loan in a single transaction. This is possible because of the time that a transaction is started and when it is finally committed to a block on the blockchain.
Here are the steps of a flash loan:
1. Borrower executes a Flash loan smart contract
2. A flash loan contract requests a loan amount from the liquidity pool
3. The contract then uses loan funds to execute defined operations (eg trading on an exchange)
4. After operations are completed, the borrowed funds are returned to the liquidity pool
5. The transaction is committed to the blockchain
Smart contracts allow us to validate that:
The flash loan has the required funds to perform the operations in the smart contract.
The operations are complete before the transaction is added to a new block
The operations do not result in a loss of funds for the borrower.
The lending pool is paid back the correct amount + a transaction fee for using the protocol.
The borrower can do whatever they like with the funds as long as the lender is paid back the corrected lent amount. Some popular use cases of Flash Loans are:
- Trading Arbitrage - taking a token from one exchange to another exchange with a higher value to make a profit
- Collateral Swap - swapping tokens of collateralized loans to another token as collateral for an existing loan
- Self-Liquidation - repaying a collateralized loan by swapping tokens and repaying the flash loan
Before a flash loan contract executes, the contract needs to be funded. Flash loan funding typically comes through one main lending protocol, Aave.
The mechanisms of a flash loan allow for easy borrowing because they do not require any collateral. This feature can also open a flash loan up to attackers that perform flash loan attacks. A flash loan attack is when a borrower borrows some funds, manipulates the price of the asset, and then returns the borrowed asset at a large profit to themselves. This is usually done either by compromising the pricing oracle or creating artificial movements in the market. Choosing decentralized oracles like Chainlink and auditing smart contracts through services like OpenZepplin are steps to prevent these types of attacks.
What is Aave?
With traditional loans, banks provide funding. In DeFi, the Aave Protocol is the largest source of funding for flash loans. Aave allows users to supply liquidity pools of ERC20 Tokens. Borrowers can then use these pools to receive loans. Depending on the type of loan, borrowers pay an interest rate which goes to the suppliers to receive interest on the tokens they supply. Currently the Aave protocol also charges a transaction fee of 0.09%.
Let's look at how all these concepts come together to create a flash loan:
Requirements
- Access to Remix IDE
- Creation of a Metamask Wallet
- Access to the Github Gists - Smart Contract Code
Getting the smart contract code
1 ) Open up a new workspace in the Remix IDE.
2) In a separate tab, open up the Github Gists here. This contains the smart contract code that we will use to create our flash loan.
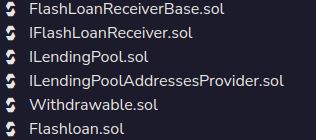
3) Create new contract files in the Remix IDE with the exact naming below and copy and paste the code connected to that file (6):
- Flashloan.sol
- FlashloanRecieverBase.sol
- IFlashLoanReciever.sol
- ILendingPool.sol
- ILendingPoolAnddressesProvider.sol
- Withdrawable.sol
About the contracts
Flashloan.sol - This is the flash loan smart contract. It contains an ExecuteOperation function that the contract
will call to complete the operations that will use the funds from the loan.
FlashLoanRecieverBase.sol / IFlashLoanReciever.sol - This is what allows the contract to receive funds for the flash loan
ILendingPool.sol / ILendingPoolAddressProvider.sol - Points to the Aave lending pools that will fund the flash loan
Withdrawable.sol - Allows for other contracts to withdraw funds from this contract in the case of incorrect or stuck funds
Add funds to wallet
We will be using the Kovan Test Network in order to deploy and execute our flash loan contract. We need to have funds in our wallet in order to do this successfully:
1. Go to https://faucets.chain.link/kovan
2. Enter your Wallet Address:
- How to get your wallet address
- Select the Kovan Network on your Metamask Wallet
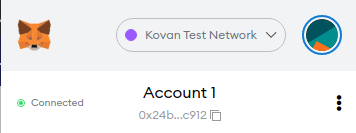
3. Make sure to select .1 Test Eth

4. Wait for confirmation that the tokens have been transferred
5. Funds should be added to your Metamask Wallet
Deploy the contract
Now that we have some funds in our wallet, it is now time that we deploy the smart contract to the Kovan Testnet so that we can execute and interact with it.
1) Go to the Solidity Compiler on the side panel inside Remix

2) Use the settings below:
Compiler: 0.6.6+comitt.6c…
Language: Solidity
EVM Version: Default
Compile Flashloan.sol
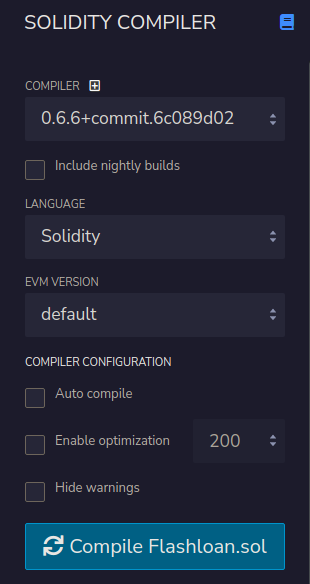
4) Click 'Compile' - You may receive some warnings but no errors if done successfully
After compiling the flash loan smart contract, we need to deploy it:
1) Go to the 'Deploy and Run Transactions' tab

2) Use the following settings:
Environment: Injected Web3
Account: Copy and Paste Your Kovan Wallet Address
Contract: Flashloan - contracts/Flashloan
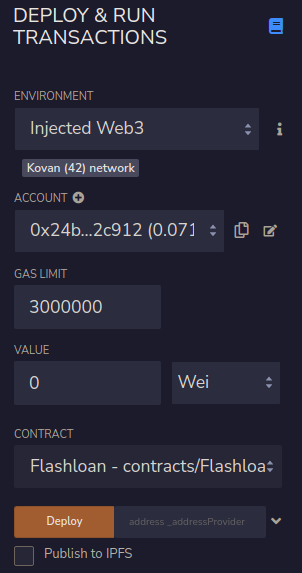
3) Add the Lending Pool Contract as the address_addressProvider: 0x506B0B2CF20FAA8f38a4E2B524EE43e1f4458Cc5 . This is the address for the lending provider for Aave. You can find other contract addresses here.

4) Click 'Deploy’
5) Metamask should popup for you to 'Confirm' the transaction. Inside your terminal, you’ll see the link to view your transaction on etherscan.

Add funds to the flash loan
Our smart contract has now been deployed to the Kovan Test Network. We will need to add funds to the contract from the testnet lending pool of Aave.
1. Go to this page: https://staging.aave.com/?marketName=proto_kovan
2. Connect Your Metamask Wallet
3. Make sure that you’re using the 'Kovan Ethereum Market'. There will be a small 'K'

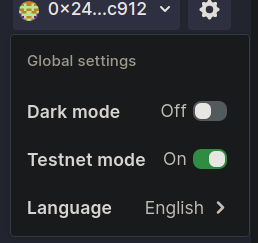
Note: You may need to enable ‘Testnet mode’ in your settings.
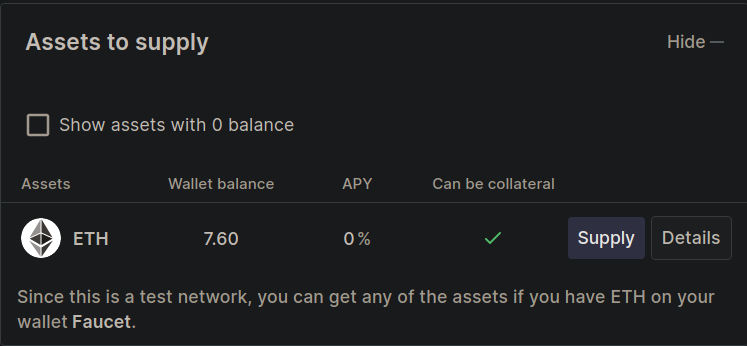
4. Supply some test Eth to Aave by clicking on the ‘Supply’ button under ‘Assets to supply’ . We can start with .001
5. Then borrow some DAI by clicking on the ‘Borrow’ button next to DAI. Borrow 10 DAI.

6. Metamask should open up to confirm the transaction and the DAI will show up in your wallet once the transaction is complete:
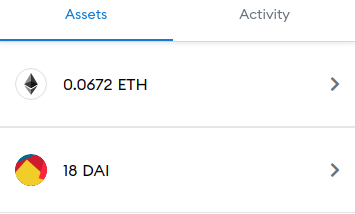
7. If this is the first time receiving DAI, you will need to set up your wallet so that you can see DAI in your wallet.
Go to ‘Import Tokens’ inside Metamask

Enter the DAI contract address for Kovan: 0xFf795577d9AC8bD7D90Ee22b6C170349
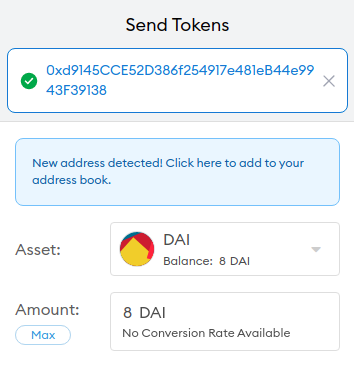
8. Once you have DAI inside your wallet, send 10 DAI to your deployed contract. You can get your deployed contract address by copying it from Remix:

Then send it to the address using Metamask:
Execute the flash loan contract
Now we need to call Aave’s KovanTestnet DAI contract to indicate what asset we will be using in order to execute the smart contract.
1. Go back to your Remix IDE and to the 'Deploy & Run Transactions' tab
2. Under 'Deployed Contracts' you will see your flash loan and contract address
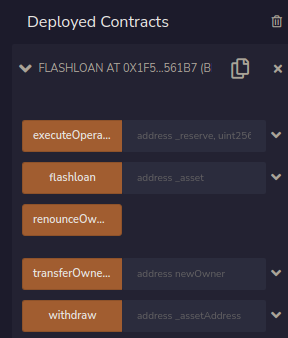
3. Go to the text field labeled ‘address asset’ next to the label 'flashloan'

4. Enter this contract address in address_asset field: 0xFf795577d9AC8bD7D90Ee22b6C1703490b6512FD . Then click on the flashloan label button in order to start the transaction.
5. This will start the flash loan process and generate 3 transactions on etherscan.

The first transaction is from the lending pool to our flash loan contract. Since we did not include any operations to the smart contract, the amount is returned to the lending pool plus an additional fee. The last transaction is the interest for the amount borrowed, which would go to the suppliers of the liquidity pool.

Related overviews
DeFi AI agents are here. Build intelligent agents that automate, reason, and execute in DeFi using Alchemy.
Off-chain attacks caused 80.4% of 2024 crypto losses. Smart wallets offer better security, here's how.
Learn About Ethereum's Liquid Staking Token Ecosystem And The Top Players

Build blockchain magic
Alchemy combines the most powerful web3 developer products and tools with resources, community and legendary support.